Non-fungible tokens, or NFTs, are one-of-a-kind digital collectibles stored on a blockchain. In simple terms, you can craft your NFT directly on NFT platforms by minting and uploading your artwork.
The demand for these distinctive cryptocurrency assets is rising, with some selling for staggering amounts. In 2021, Beeple, a digital artist, fetched over $69 million for a single NFT.
In this comprehensive blog post, we delve into a step-by-step guide, empowering artists and creators to navigate the intricate process of crafting, minting, and selling their unique digital assets.
Step 1. Create Artwork and Designs
Creating NFTs involves several steps, and the initial one is crafting unique artwork and designs. Begin by conceiving a digital or digitized piece of art that you wish to tokenize.
This could range from digital paintings and illustrations to 3D models, music files, photos, or creative expression.
Ensure that your creation is original and significant to you as an artist. Commonly, digital art for NFTs is often in the form of PNG, GIF, or JPEG files.
Consider the theme, style, and overall concept of your creation. Some artists find inspiration in current trends, while others explore more avant-garde or personal themes.
Remember that NFTs are not just about the image or content; they encapsulate the artist’s story and vision, making the creative process a pivotal aspect of NFT value.
Invest time perfecting your creation, ensuring it stands out in the crowded digital space. Artists often use graphic design software, digital drawing tablets, or even 3D modeling tools to bring their vision to life.
Pay attention to detail, as your artwork’s authenticity and aesthetic appeal will be significant factors in attracting potential buyers.
In summary, the first step in creating an NFT involves the thoughtful creation of original digital artwork, ensuring it meets the technical requirements of the chosen blockchain.
Step 2. Choose Blockchain
When creating an NFT (Non-Fungible Token), choose a blockchain to mint and host your digital assets.
Two popular options in the NFT space are Ethereum (ETH) and Solana (SOL). Each blockchain has its unique features and considerations.
Ethereum (ETH)
Ethereum is the pioneering blockchain for NFTs, known for its established NFT ecosystem and broad support among marketplaces.
Its widely adopted ERC-721 and ERC-1155 standards make it easier for creators to tokenize their assets.
It operates using smart contracts, enabling the creation and execution of decentralized applications, including NFTs. ETH is often preferred for its robust ecosystem and recognition within the NFT community.
However, it’s essential to be mindful of potential drawbacks, such as network congestion and high transaction fees during peak times.
Solana (SOL)
Solana has gained significant traction as a high-performance blockchain, offering faster transaction speeds and lower fees than Ethereum.
Its scalability and efficiency make it an attractive option for NFT creators seeking a more cost-effective and seamless minting process.
Solana’s ecosystem continues to evolve, with various projects and marketplaces emerging to support NFTs.
Choosing Solana may appeal to those looking for a blockchain focusing on scalability and reduced transaction costs.
Ultimately, the choice between Ethereum and Solana depends on your specific needs and preferences.
Ethereum provides a well-established platform with a vast user base, while Solana offers speed and cost advantages.
Consider factors like community support, development resources, and your target audience when deciding which blockchain aligns best with your NFT creation goals.
Step 3. Select an NFT Marketplace
Choosing an NFT marketplace is crucial in minting and selling non-fungible tokens (NFTs).
NFT marketplaces act as platforms where creators can showcase and sell their digital assets.
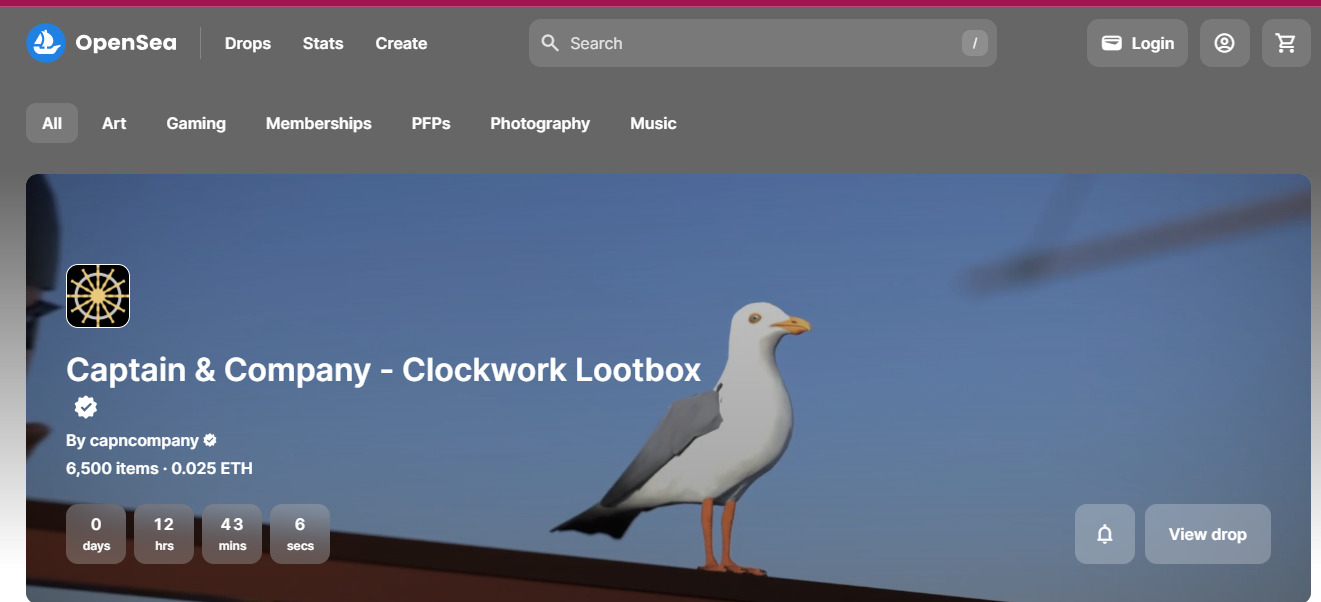
One popular creator choice is OpenSea, a decentralized marketplace built on the Ethereum blockchain.
Ethereum is a widely adopted blockchain for NFTs due to its smart contract functionality.
It enables the creation and execution of self-executing contracts, including those representing ownership of digital assets.
OpenSea provides a user-friendly interface for creators and buyers, making it an attractive option for those new to the NFT space.
Additionally, it supports various file formats, allowing creators to mint a diverse range of digital content as NFTs, from images and videos to 3D models.
The platform’s compatibility with different NFTs enhances the creative possibilities for artists and collectors alike.
Furthermore, OpenSea offers a decentralized and transparent environment for transactions.
This means that artists have more control over their digital assets, and buyers can verify the authenticity and ownership history of the NFTs they are interested in purchasing.
The decentralized nature of OpenSea also aligns with the core principles of blockchain technology, providing a trustless and secure environment for NFT trading.
In summary, selecting an NFT marketplace such as OpenSea involves considering factors like platform usability, blockchain compatibility (in this case, Ethereum), file format support, and the decentralized nature of the marketplace.
Step 4. Upload NFT on OpenSea
Creating an NFT with Opensea consists of 2 parts. Here are simple steps to create and upload your NFT on Opensea.
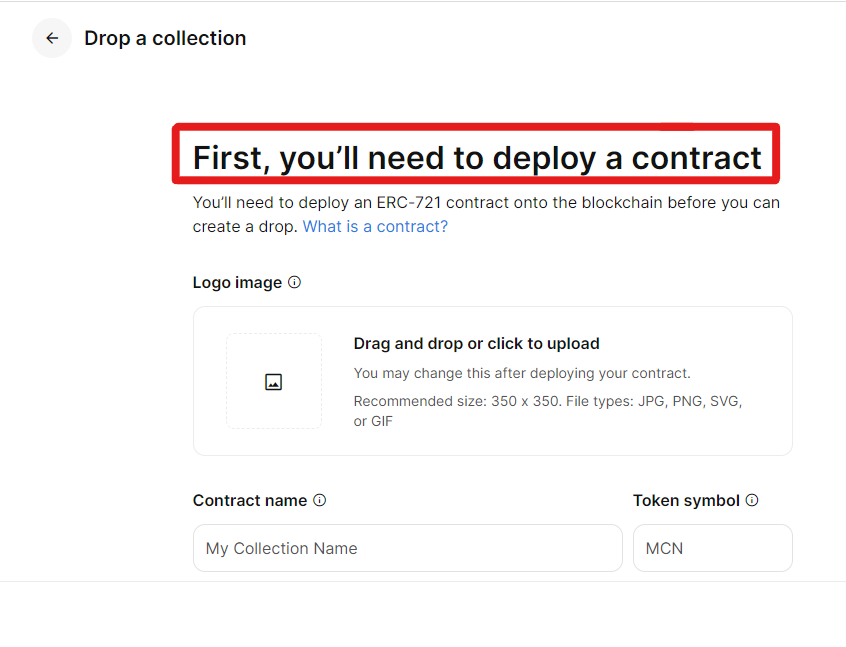
Part 1: Deploy a Contract
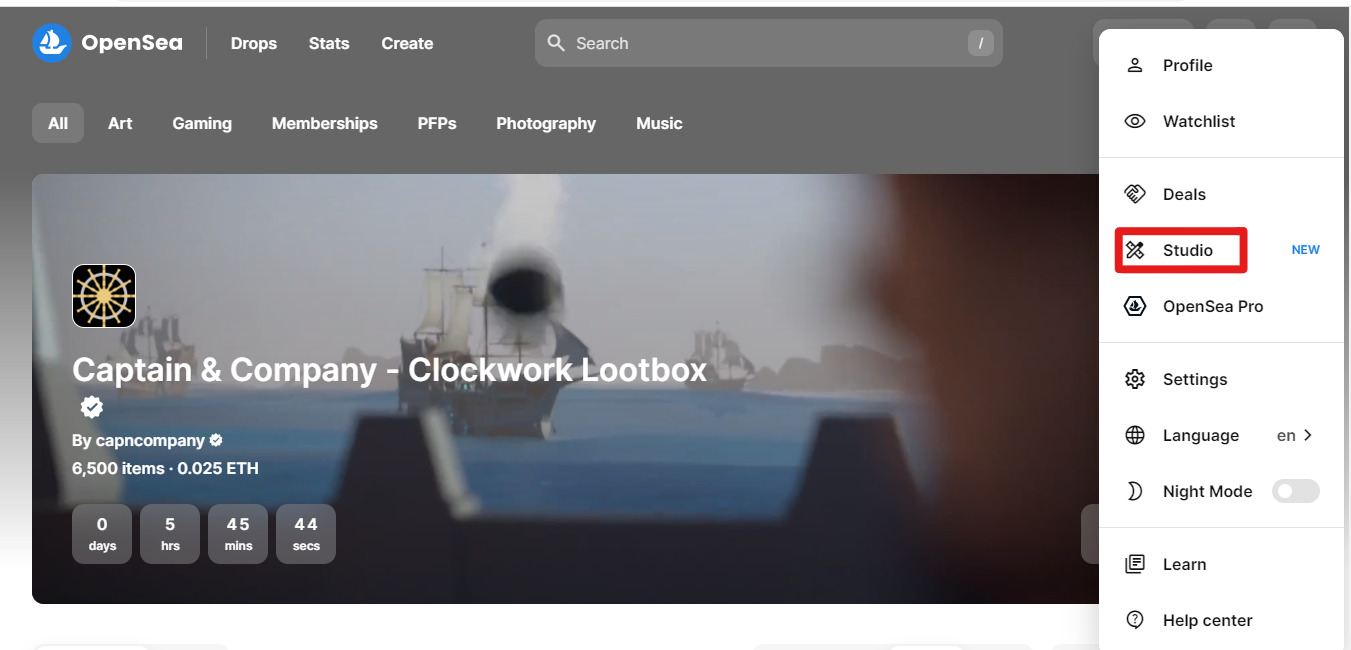
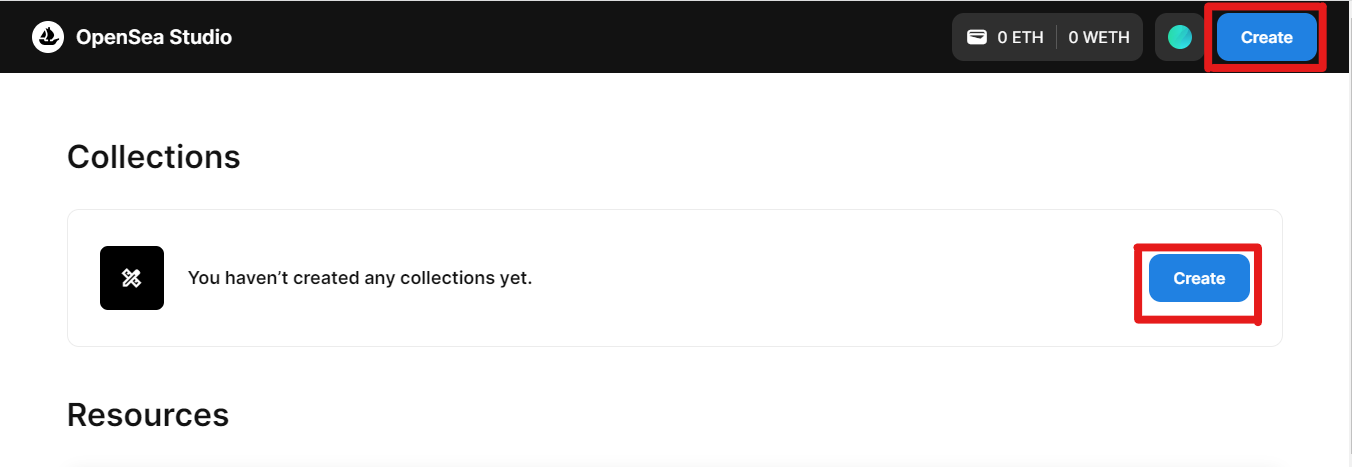
1. Access OpenSea Studio through Your Profile Icon: After logging into your account, begin your NFT creation journey on OpenSea by navigating to the Studio through your Profile icon. This serves as the starting point for creating a new NFT or collection.
2. Initiate NFT or Collection Creation: On the Studio landing page, select “Create” to initiate the creation process. This step marks the beginning of crafting your unique digital asset.
3. Choose Create an NFT: Opt for “Create an NFT” within the Studio interface to directly mint your NFT into your wallet. Note that NFTs cannot be transferred between collections after creation.
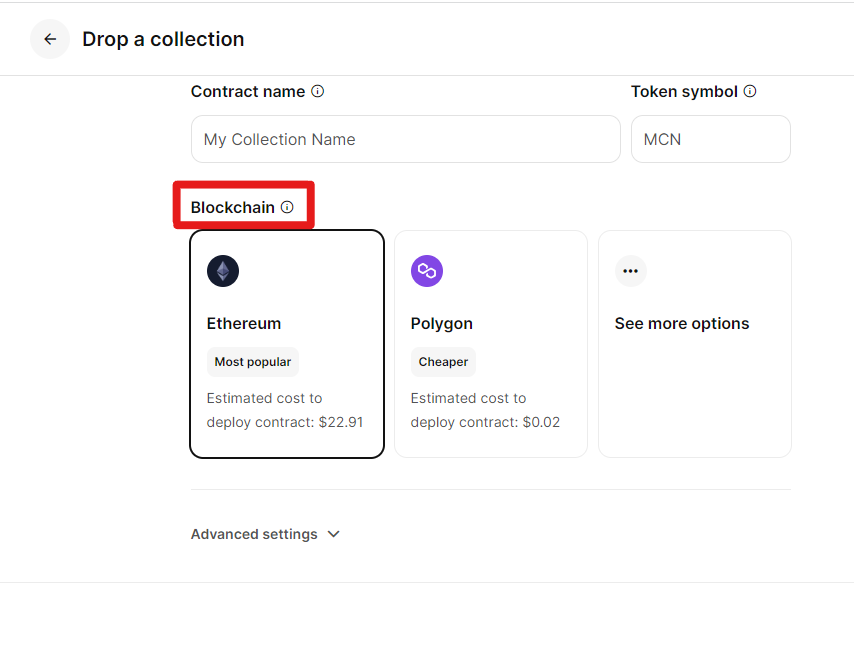
4. Fill Details for New Collection: In the “Create an NFT” screen, choose ” Create a new collection if you’re a first-time user, choose “Create a new collection.” Input essential details such as logo, contact name, and token symbol, and select an EVM blockchain for your collection.![]()
5. Deploy Smart Contract: Follow on-screen instructions to deploy a smart contract for your new collection.
Take note of gas fees and ensure the accuracy of the provided information. Confirm the deployment to proceed.
6. Confirm Transaction and Progress: After deploying the contract, confirm the transaction in your wallet. Click “Continue” to advance to the next step in the NFT creation process.
![]()
Part 2: NFT Creation
1. Upload Media for Your NFT: Utilize the OpenSea platform to upload your digital media, employing either a drag-and-drop method or selecting a file directly from your computer.
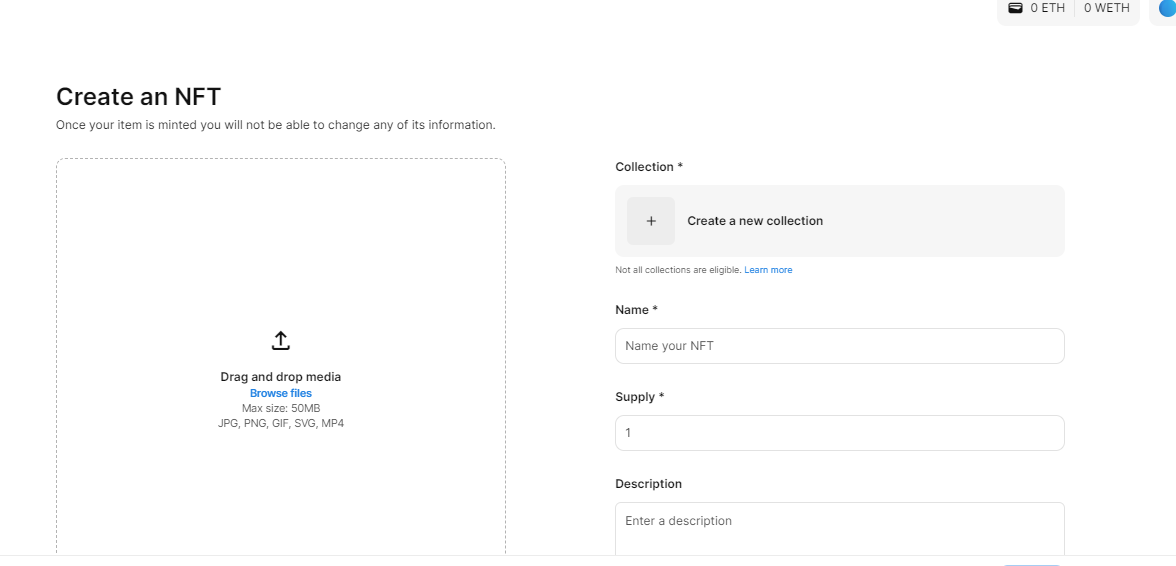
2. Choose Collection for Minting: Select the appropriate collection for minting your NFT establishing a thematic or categorical grouping for your digital assets.
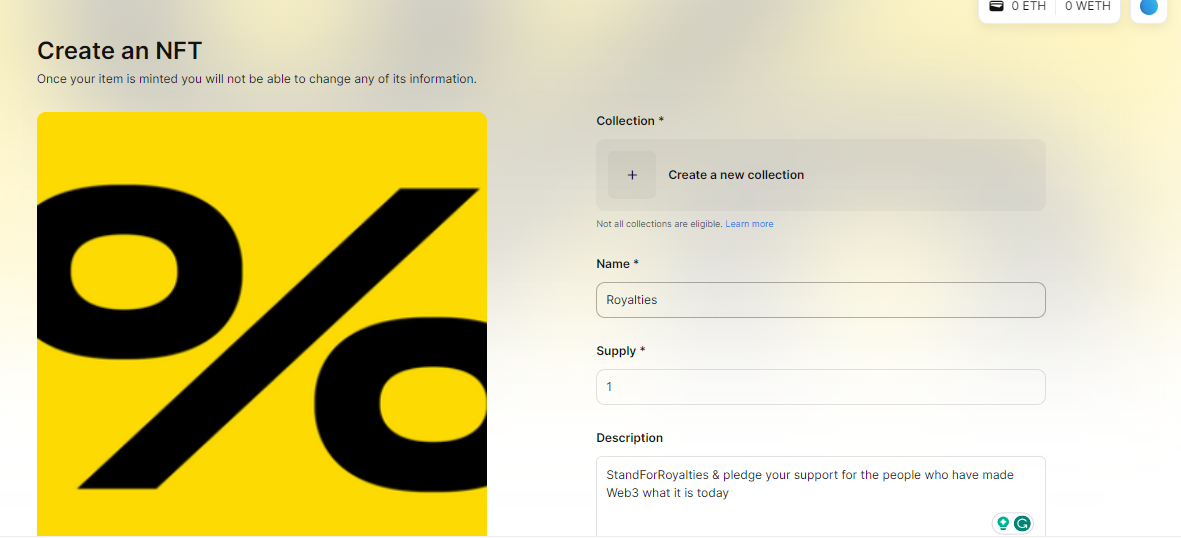
3. Provide Name and Set Item Supply: Assign a distinctive name to your NFT and determine the item supply, specifying the number of copies. Setting it to 1 ensures the uniqueness of the item.
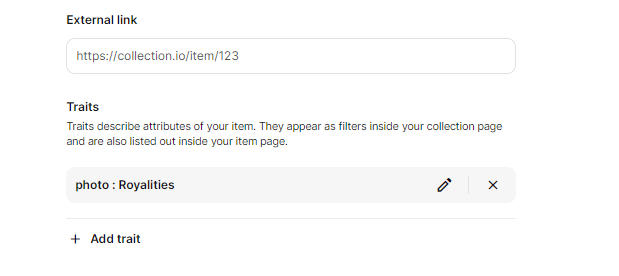
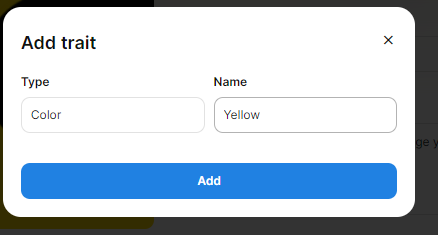
4. Personalize with Description, External Link, and Traits: Add a personal touch to your NFT by including optional details, such as a description of external links and defining unique traits that enhance its characteristics.
5. Click “Create” and Await Minting: Initiate the NFT creation process by clicking “Create.” A loading message will appear as the minting occurs, and your wallet will require approval for the transaction. Be prepared to confirm this final step.
Step 5. List the NFTs for Sale
Listing NFTs for sale marks a pivotal step in the journey of creators and collectors within the NFT ecosystem. After meticulously crafting and minting digital assets, the next phase involves presenting them to the audience.
This process often occurs on NFT marketplaces like OpenSea, where creators gain exposure to potential buyers.
Once the NFT is uploaded to the chosen marketplace, creators delve into the customization options, providing essential details to make their creations stand out.
Crafting an engaging title, adding a detailed description, and incorporating unique attributes are key components in attracting potential buyers.
Setting a competitive and fair price is another critical aspect of the listing process. Creators need to consider market trends, their creations’ uniqueness, and potential buyers’ perceived value.
NFT marketplaces typically allow creators to choose between fixed prices and auction-style listings, providing flexibility in their sales approach.
Moreover, creators might explore additional features offered by the marketplace, such as limited editions, unlockable content, or collaborations, to enhance the appeal of their NFT.
By leveraging these tools, creators can differentiate their listings in a crowded marketplace, increasing the likelihood of sales and establishing a presence in the dynamic world of non-fungible tokens.
Fees involved with NFTs
Participating in the NFT (Non-Fungible Token) space involves a nuanced understanding of the associated fees, which play a crucial role in the overall process. These fees can be categorized into several key components.
- Gas Fees: Gas fees come into play for NFTs built on blockchain networks like Ethereum. Gas fees cover the computational work required to validate and process transactions. As Ethereum is a widely used platform for NFTs, users may encounter varying gas fees influenced by network congestion. These fees can fluctuate, making it crucial for creators to consider transaction costs during minting and selling processes.
- Marketplace Fees: NFT marketplaces act as platforms for creators to showcase and sell their digital assets. However, these platforms typically charge fees for listing and selling NFTs. OpenSea, for instance, imposes a transaction fee on successful sales. Creators should be aware of these charges and factor them into their pricing strategies when listing NFTs for sale.
- Blockchain-Specific Costs: Different blockchains have distinct cost structures associated with NFT transactions. For example, Solana operates on a unique fee system separate from Ethereum. Creators must consider blockchain-specific costs when choosing a platform for minting and selling their NFTs.
- Fee to Claim Royalty: NFT creators often add a royalty percentage in their smart contracts, ensuring they receive a percentage of the resale price whenever the NFT changes hands. While this royalty serves as a mechanism for artists to benefit from the appreciation of their work, it’s essential to note that some platforms may charge a fee when claiming these royalties.
FAQs
Can I make an NFT without spending money?
Yes, you can create an NFT without spending money by utilizing platforms that offer free minting services.
However, it’s essential to consider potential associated costs. Blockchain networks like Ethereum often entail gas fees for transactions.
Is it hard to create an NFT on your own?
Creating an NFT can be straightforward with user-friendly platforms, but challenges may arise in understanding blockchain intricacies and associated fees.
Beginners might find the process initially complex, involving digital creation, blockchain selection, and marketplace navigation.
However, resources and tutorials are available to guide you through each step, making the overall process accessible with a moderate learning curve.
What is meant by lazy minting?
Lazy minting refers to a method where NFTs are minted on the blockchain only when sold, conserving resources and avoiding upfront costs.
Unlike traditional minting, which pre-generates tokens, lazy minting creates NFTs dynamically, reducing the environmental impact and allowing creators to mint without immediate blockchain interaction until a sale occurs.
What is the limit on the number of individuals who can own a single NFT?
NFT ownership operates individually, meaning one person can own a specific NFT simultaneously.
The uniqueness and indivisibility of non-fungible tokens ensure exclusive ownership, allowing one individual to possess and trade a particular digital asset on blockchain platforms like Ethereum or Solana.
Can a PDF file be turned into an NFT?
Yes, a PDF file can be transformed into an NFT. However, NFTs are commonly associated with visual or digital art.
When converting a PDF to an NFT, consider breaking it into individual images or selecting a specific page for tokenization.
Bottom Line
Exploring the NFT landscape requires a careful journey—from creating distinctive artwork to choosing the appropriate blockchain and marketplace.
Platforms like Ethereum and Solana offer unique benefits, while decentralized marketplaces like OpenSea provide transparency.
Creators need to comprehend fees, including gas fees and royalties, to optimize their NFT creation and selling process.

![How to Withdraw funds from MetaMask [2024]](https://www.cryptowinrate.com/wp-content/uploads/2024/06/Add-a-little-bit-of-body-text-1024x597.jpg)