
Decentralized exchanges like Uniswap can be difficult to navigate, especially for first-time users. But the trade-off is well worth it, as it gives you total control over your funds. By connecting your MetaMask wallet, Uniswap streamlines the experience, allowing you to swap tokens safely and quickly without the need for intermediaries. This guide will walk you through using Uniswap to swap tokens using MetaMask for easy token exchanges.
What is Uniswap?
Uniswap is a decentralized exchange (DEX), and it uses an Automated Market Maker (AMM), allowing users to swap tokens directly from their wallets. Rather than an order book, Uniswap relies on liquidity pools, where users deposit token pairs into a smart contract to enable trading. This model makes transactions fast, permissionless, and resistant to censorship.
As a multi-chain platform, Uniswap’s latest version (v4) has been deployed across over 12 networks. These include Ethereum, Arbitrum, BNB Chain, Polygon, Base, and more. This broad support ensures users can access a wide range of assets. Users benefit from lower fees and faster speeds on various Layer 2 solutions.
Uniswap is a leading platform in DeFi, regularly handling significant daily trading volume ranging from $1.5 billion to $4 billion, as noted by DeFiLlama. Its deep liquidity and compatibility with numerous assets make it an efficient choice for swapping tokens directly from a wallet.
What You Need Before You Start
After deciding to use Uniswap to swap your token with MetaMask, ensure MetaMask is installed and configured on your device. MetaMask is available for Android and iOS devices, as well as a browser extension for Opera, Chrome, Brave, and others. MetaMask security is high-end, the wallet is easy to use, and it works well for token swaps and Web3 activities.
Ensure your wallet has sufficient funds for the primary token of the network you intend to use. For example, you need ETH for Ethereum, MATIC for Polygon, or BNB for BNB Chain. Every swap on Uniswap has a fee, so be sure you have enough funds to cover it.
To protect yourself from scams, always ensure you are on the genuine Uniswap website before connecting your wallet. Double-check the web address and look for a secure connection. Once your wallet is set up and funded, you can follow these steps to swap tokens.
How to Use UniSwap to Swap Tokens with MetaMask
Below, you’ll find step-by-step instructions for swapping tokens on Uniswap using MetaMask, both on desktop and on mobile devices.
Desktop
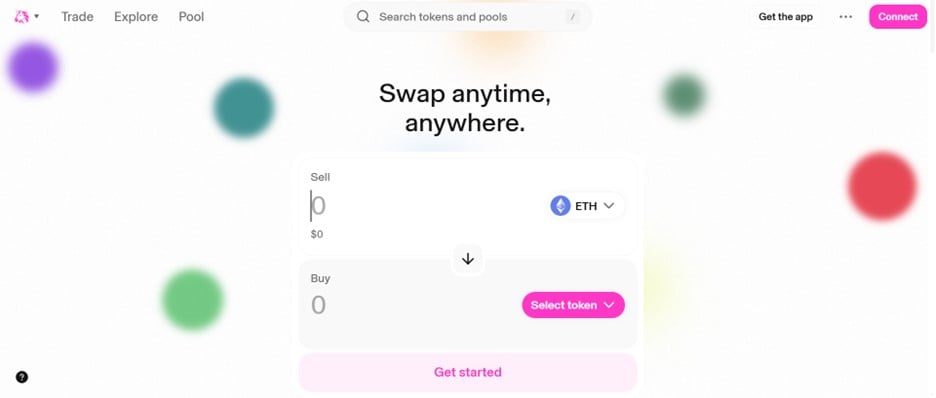
Step 1: Open your desktop browser and go to the Uniswap official website.
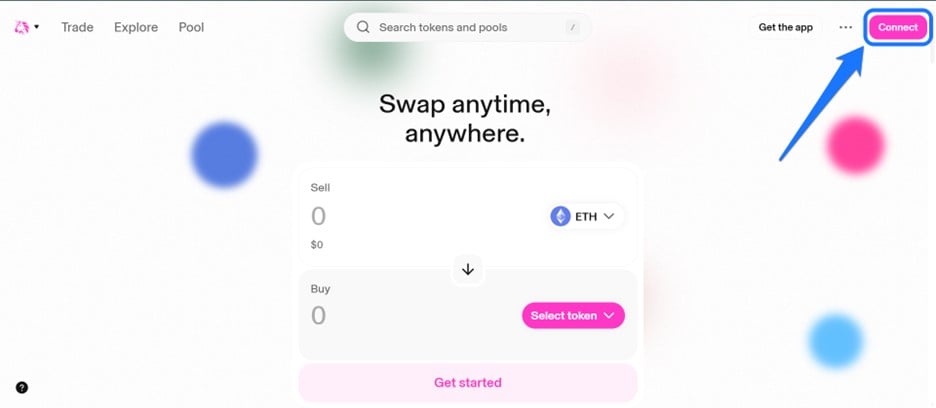
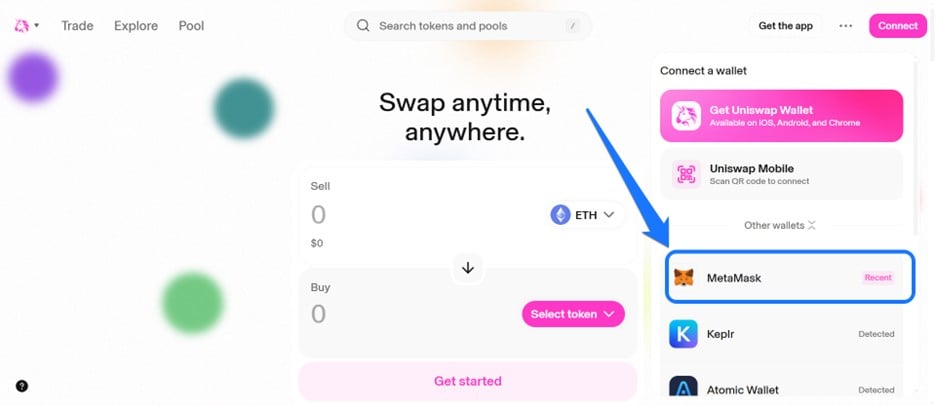
Step 2: Click the “Connect” button located at the top right corner of the page to link your MetaMask wallet with the platform.
Step 3: Select MetaMask and confirm the connection in the MetaMask extension pop-up.
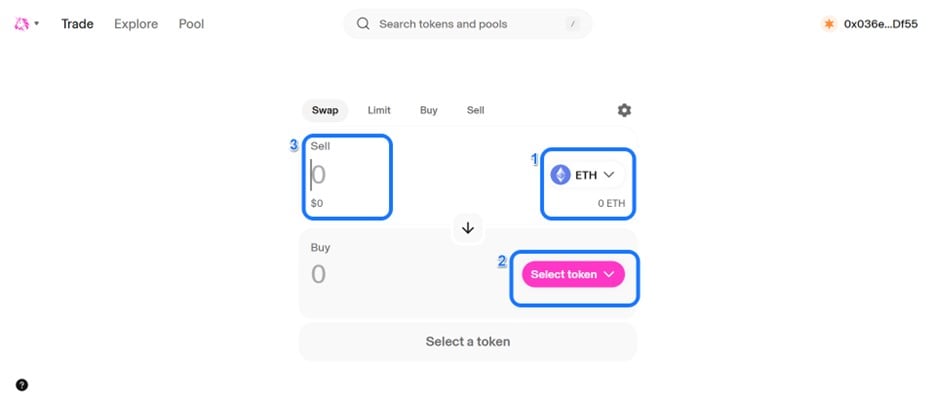
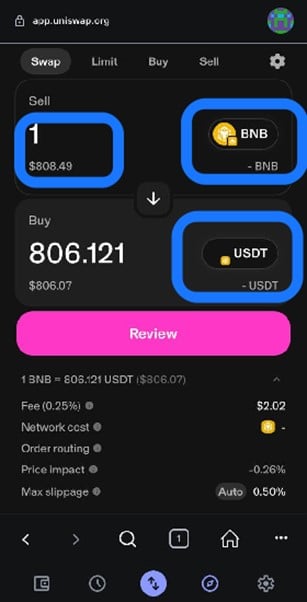
Step 4: Select the token you want to swap in the sell tab and specify the amount. Next, choose the token you want to swap to in the buy tab.
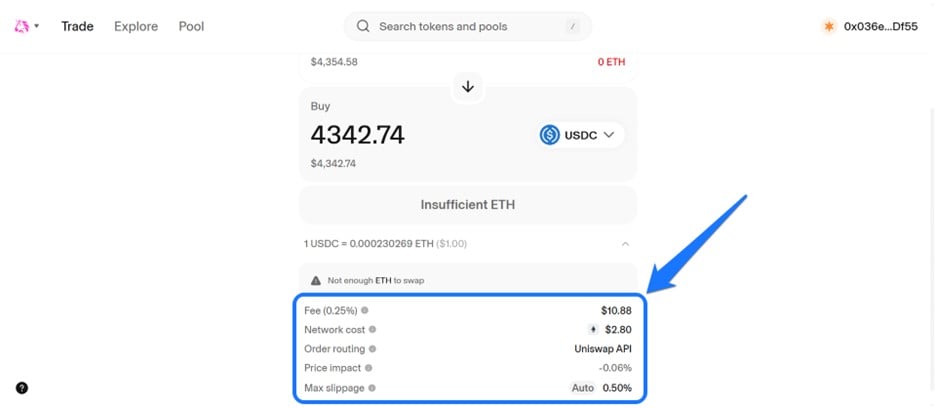
Step 5: Review the transaction details by checking the fees, network cost, and maximum output, depending on your preference for lower gas fees.
Step 6: Click on the Swap Tokens button to execute the transaction.
Mobile
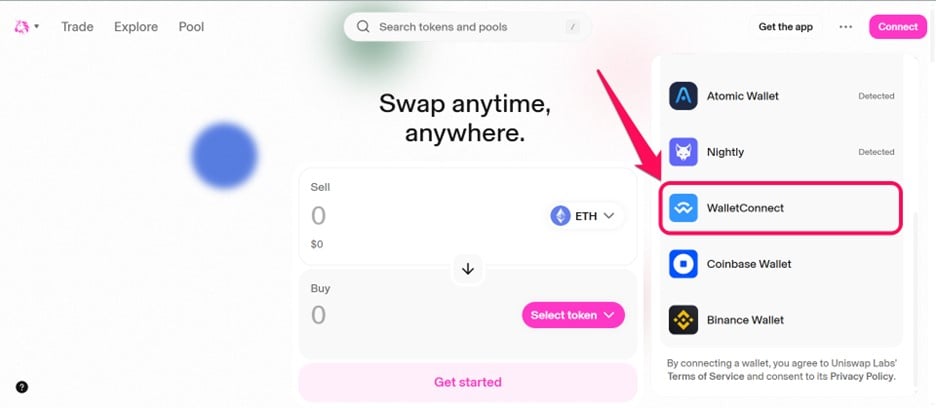
Step 1: Open the Uniswap official website in another mobile browser, click “Connect Wallet,” and select “WalletConnect.”
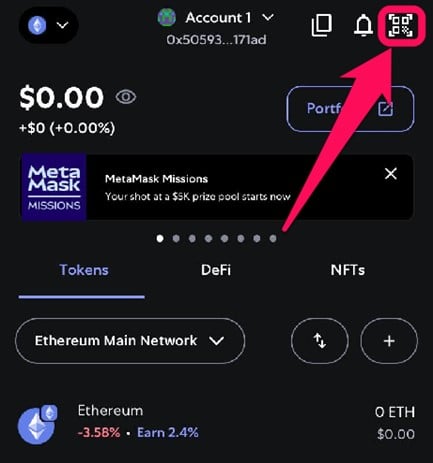
Step 2: A QR code will appear on the screen. Open your Metamask mobile wallet and click the QR code scanner in the upper right corner.
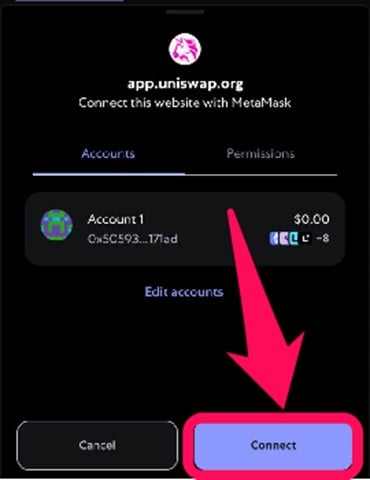
Step 3: Scan the QR code from the Uniswap website, then confirm the connection on Metamask.
Step 4: Alternatively, open MetaMask and use the dApps browser tab to visit Uniswap.
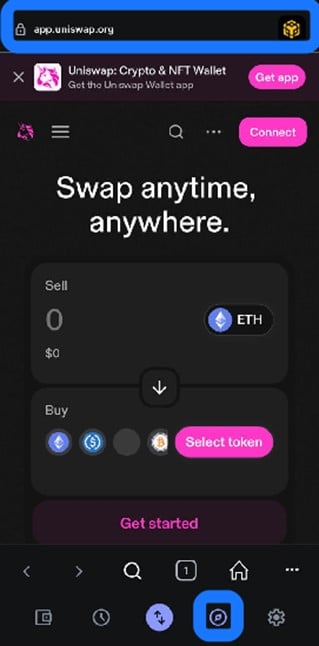
Step 5: Click the “Connect” button located at the top right corner of the page, and the webpage will detect that you’re using a MetaMask wallet.
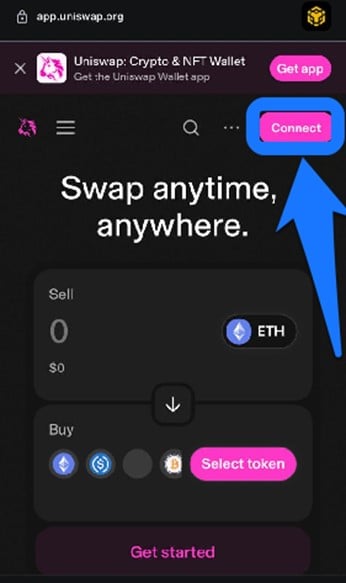
Step 6: Tap MetaMask and approve the connection in the pop-up.

Step 7: In the Uniswap interface, select the token you want to swap and specify the one you want to receive. Review details, approve the transaction, and execute the swap.
Troubleshooting Tips
Swapping tokens on Uniswap is usually simple, but sometimes problems come up during or after a swap. Many of these issues are easy to fix, even if you’re new to crypto. Here are some common problems and their solutions.
Issue 1: Swapped Tokens Don’t Appear in MetaMask
Solution: This is a display issue, not a loss of funds, so you need to manually add the token to your wallet. Find the token’s contract address on a blockchain explorer (like Etherscan or Polygonscan). In MetaMask, go to “Assets,” then “Import tokens,” select “Custom Token,” and paste the contract address to make the token visible.
Issue 2: Transaction Fails Due to Slippage Tolerance
Solution: Go to the swap settings (represented by the gear icon) and manually increase the slippage tolerance. For volatile or low-liquidity assets, a tolerance of 1-3% is often necessary, but be mindful that a higher tolerance means you could get a less favorable price.
Issue 3: Transaction Stuck in “Pending” Status
In MetaMask, locate the pending transaction in your activity log. Use the “Speed Up” feature to resubmit the transaction with a higher, more competitive gas fee. Alternatively, you can “Cancel” the transaction and start over with a higher gas fee.
Issue 4: “Liquidity Not Found” or High Price Impact Warning
Solution: The best way to resolve this is to reduce the amount of the token you are swapping. You can also try splitting your large swap into several smaller ones, although this will incur multiple gas fees. Sometimes, waiting for more liquidity to enter the pool is the only option.
Bottom Line
Swapping tokens with Uniswap and MetaMask is a secure and easy way to use decentralized finance. Simply connect your wallet and follow the steps in this guide to make quick trades across various networks. Always verify that you’re on the official Uniswap website and refer to our troubleshooting tips if you encounter any issues.