

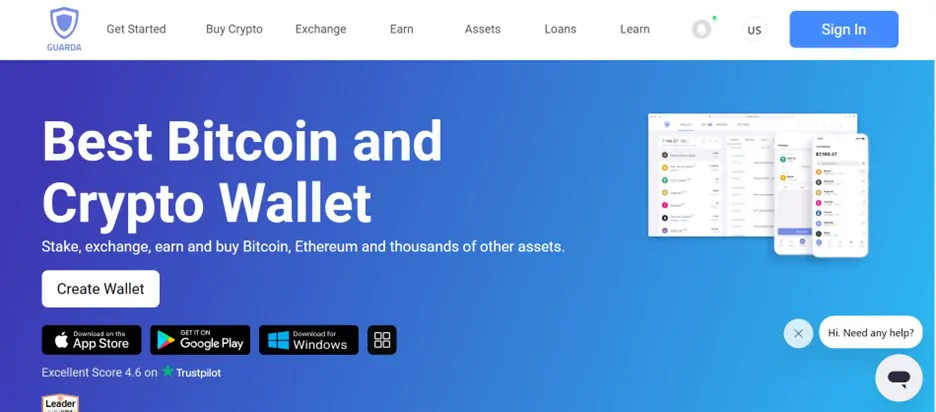
For users curious about what is XRP and want a wallet to store this token, you’re in the right place. In this article, we’ll introduce you to Guarda Wallet, one of the best XRP wallets that lets you interact with XRPL. Beyond that, Guarda also supports a wide range of networks, bringing crypto storage and management services to your fingertips. Read on to learn how to download, register, and acquire the information needed to get started with Guarda Wallet.
Why Do I Need Guarda Wallet?
You need Guarda Wallet if all you want to do is manage your XRP tokens as you like with maximum security. The non-custodial, multi-chain crypto wallet also supports 70+ major blockchains, including the popular Bitcoin and Ethereum. With Guarda, you can sell, buy, exchange, and manage these supported tokens on their respective blockchains all in one platform.
Guarda Wallet features a built-in crypto purchase option with localized payment methods. Users can conveniently buy crypto and pay using local bank transfers, debit or credit cards, and other methods. By displaying the complete rates from its integrated partners, Guarda lets users evaluate the costs involved, aiding in an effective XRP purchase fees comparison for their specific transaction.
Guarda’s intuitive, user-friendly interface also makes it easy for beginners to use. In addition to its crypto management services, Guarda Wallet enables users to create personalized ERC20 tokens using the Guarda Token Generator. Also, it offers a quick-access menu option for users to connect to the Ledger Nano S hardware wallet.
Getting Started With Guarda Wallet
Download
Downloading and installing the Guarda Wallet platform is straightforward, as it does not require external plugins or software. Guarda Wallet can be a web, desktop, and mobile application for Android and iOS devices. You can also access the Guarda browser extension and Android SPV Wallet to hold various coins. Follow these steps to download and get started with Guarda Wallet:
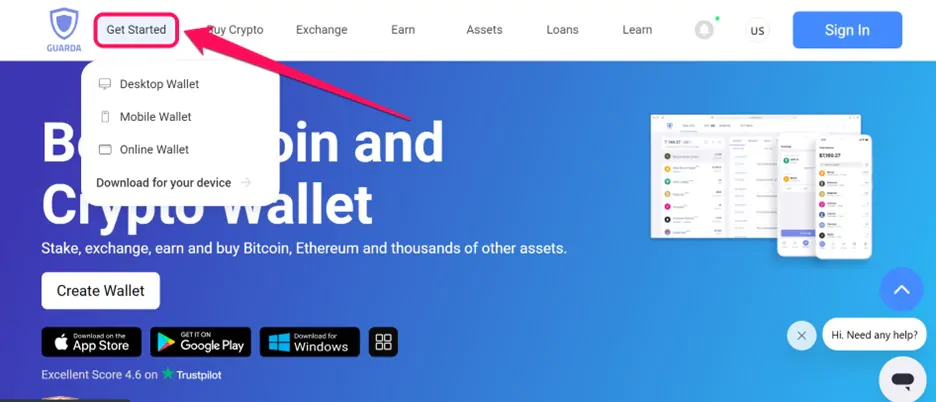
Step 1: Head to the Guarda Wallet web platform using your preferred browser.
Step 2: On the menu bar, select Get Started and choose the type of wallet you want to install (extension, mobile, online, etc).
Step 3: Alternatively, head to your device’s app store (Google Play, Apple Store, etc). Search for “Guarda Wallet” and click Install or Get once you’ve found it.

Step 4: Wait a while and launch the application once the installation is complete.
Wallet Creation
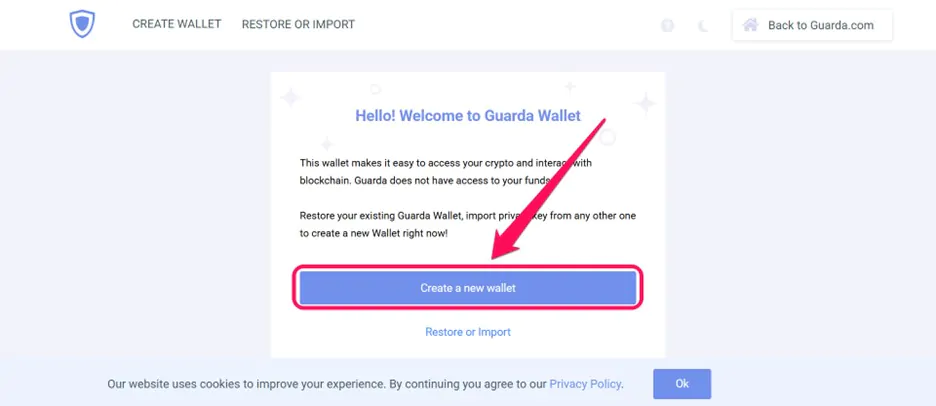
Once you’ve located and installed the application, the major step to get started with Guarda Wallet is to create a new account. You don’t need to provide your email address to create a wallet account on Guarda. The process is also simplified with step-by-step guides and explanations for every step. Here’s a step-by-step guide to building a new wallet on Guarda:
Step 1: Launch the Guarda Wallet extension, web wallet, or mobile app installed on your device.
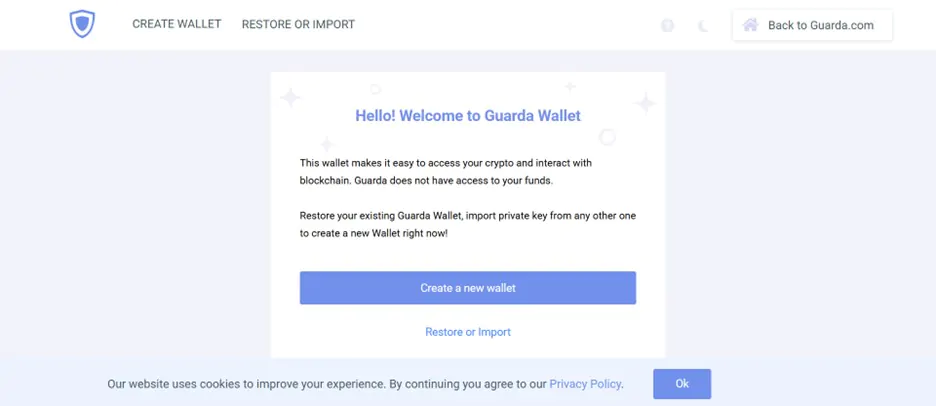
Step 2: Click Create a new wallet on the onboarding page to proceed. Select the Import or Restore option if you have an existing Guarda Wallet and want to access it on your new device.
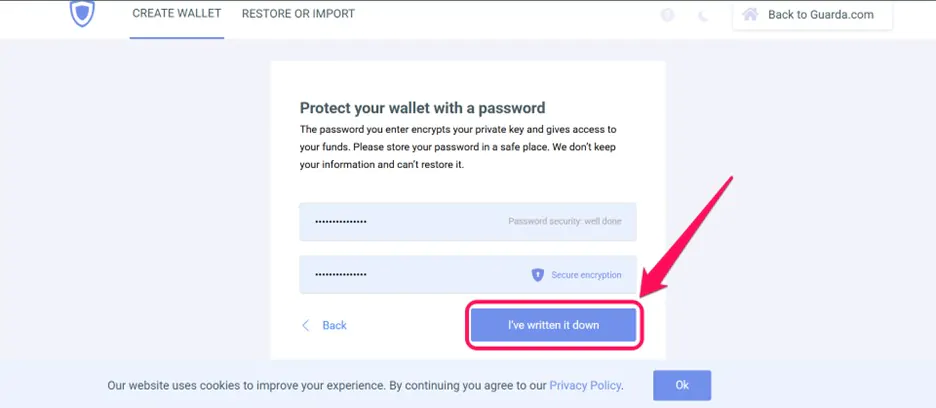
Step 3: Create a strong but memorable password to secure your wallet. Click, I have written it down to proceed.
Step 4: After that, the system starts creating your XRP wallet. Kindly wait for the process to complete, as it typically takes between 5 and 7 minutes.

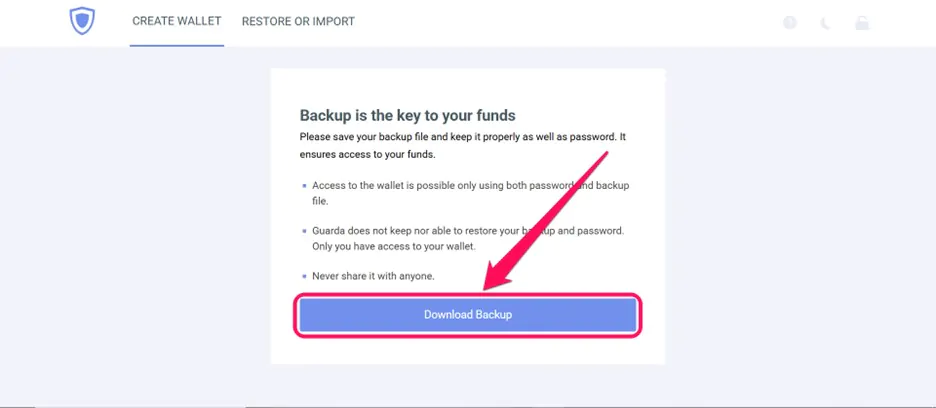
Step 5: Download and store your backup in a secure folder. Your backup file is crucial whenever you need to recover the account, so ensure you store it securely. Once you tap “Download Backup,” you will be redirected to your account dashboard.
Quick Tour of Guarda Wallet
On the main dashboard, your available crypto assets are listed by token, and you can view balances in crypto or fiat. There are also quick access icons to send, receive, exchange, stake, and buy crypto. The wallet’s overview includes an intuitive layout with swipe access to the Homepage, History, Staking, etc. Users can modify their account information on the Settings page and customize their Guarda wallet as they please.
Bottom Line
The Guarda Wallet is a top option for crypto enthusiasts seeking an all-in-one platform to manage their tokens. With it, you can perform basic and sophisticated cryptocurrency tasks without a sweat. You must download and create an account to get started with Guarda Wallet and access its services. Follow the steps highlighted in this post to install the app and successfully create a Guarda Wallet account.
FAQs
1. Is Guarda Wallet Safe?
Guarda ensures and enhances account security by encrypting all transactions with AES (Advanced Encryption Standard). Also, it doesn’t store private/public keys, passwords, or other sensitive information on its servers.
2. Can I use my Guarda Wallet on multiple devices?
Yes, thanks to Guarda’s backup system, it is possible to access your account on multiple devices simultaneously.
3. Can I update my Guarda Wallet?
Your Guarda Wallet, particularly the mobile application, usually auto-updates whenever updates are available. All you need to do is connect your device to a strong network.
4. How to withdraw on Guarda?
Enter the Guarda Wallet address: To withdraw, you need to enter your Guarda Wallet address. To do this, open your Guarda Wallet and navigate to the cryptocurrency wallet where you want to deposit the funds. Click or tap on “Receive” to find your wallet’s address.
5. Does Guarda require KYC?
Guarda doesn’t collect personal data or require KYC to create a wallet. All data is stored locally, encrypted, and recoverable through a secure backup phrase.