

- •Yoroi wallet is lightweight, allowing users to store and stake ADA without downloading the full blockchain.
- •Yoroi is available as a browser extension and mobile wallet.
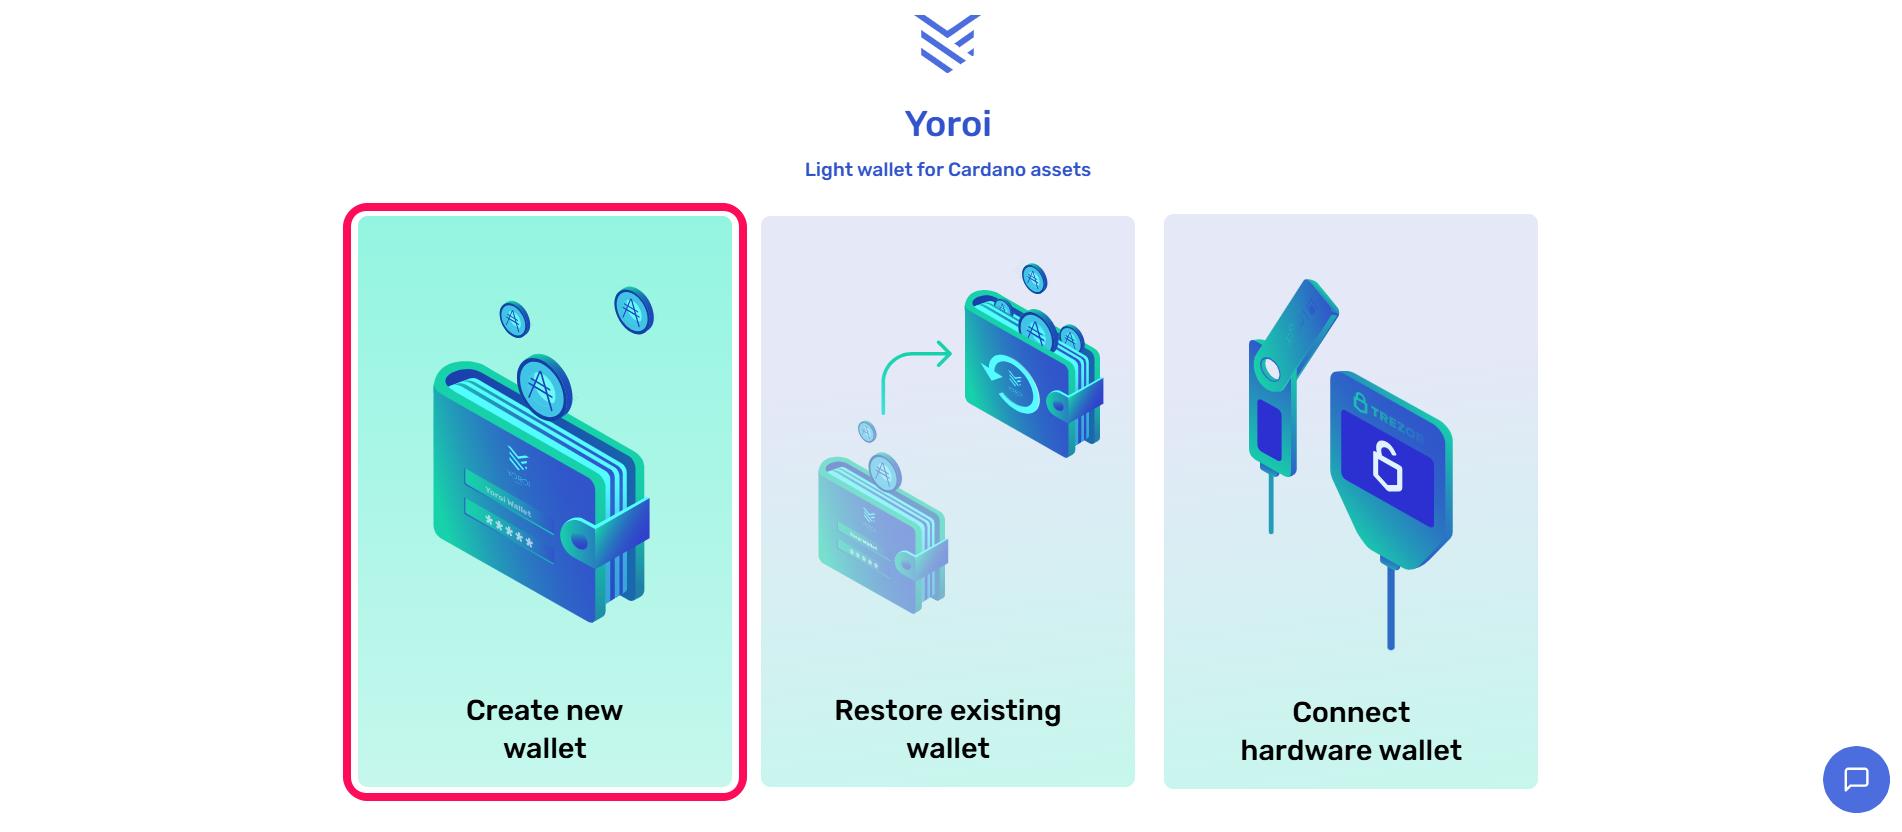
- •Users can create new wallets, restore existing wallets, or link Yoroi with hardware wallets upon installation.
For many new Cardano users, the biggest challenge is finding a wallet that balances speed, security, and instant access to the blockchain features after installation. This is primarily because popular full-node wallets often take hours to sync with Cardano, while exchanges don’t allow for self-custody. Yoroi wallet, however, is a lightweight Cardano wallet that connects directly to the network, allowing users to create a wallet, receive ADA, and start staking immediately after installation. In this guide, you’ll learn how to get started with Yoroi Wallet step by step and navigate its intuitive, user-friendly interface.
Why You Need the Yoroi Wallet
You need a Yoroi wallet if you want a fast and cost-effective way to store tokens and participate in ADA staking without running a full node. Yoroi is an open-sourced, lightweight wallet specifically designed for the Cardano network. The wallet allows you to send and receive Cardano network tokens while controlling your private keys however you want.
Users can delegate ADA to Cardano stake pools directly from within the wallet and also connect hardware wallets like Trezor for optimal security. Built by EMURGO, a prominent team in the Cardano ecosystem, Yoroi is a trusted crypto management and web3 platform for new and seasoned traders. The app also prioritizes convenience, allowing users to edit wallet addresses into user-friendly and readable names.
Additionally, Yoroi users can interact with CNFTs and connect to Cardano dApps, like Minswap, to participate in DeFi activities without leaving the app. Lastly, unlike full-node wallets, Yoroi has an official mobile app that lets users access their Cardano ADA assets on the go.
Get Started With Yoroi Wallet
To get started with Yoroi Wallet, choose the platform that best fits how you plan to use it. Since Yoroi is available on PC and mobile, the setup process starts by downloading the official app. Then you can create your account and start exploring Cardano.
Download
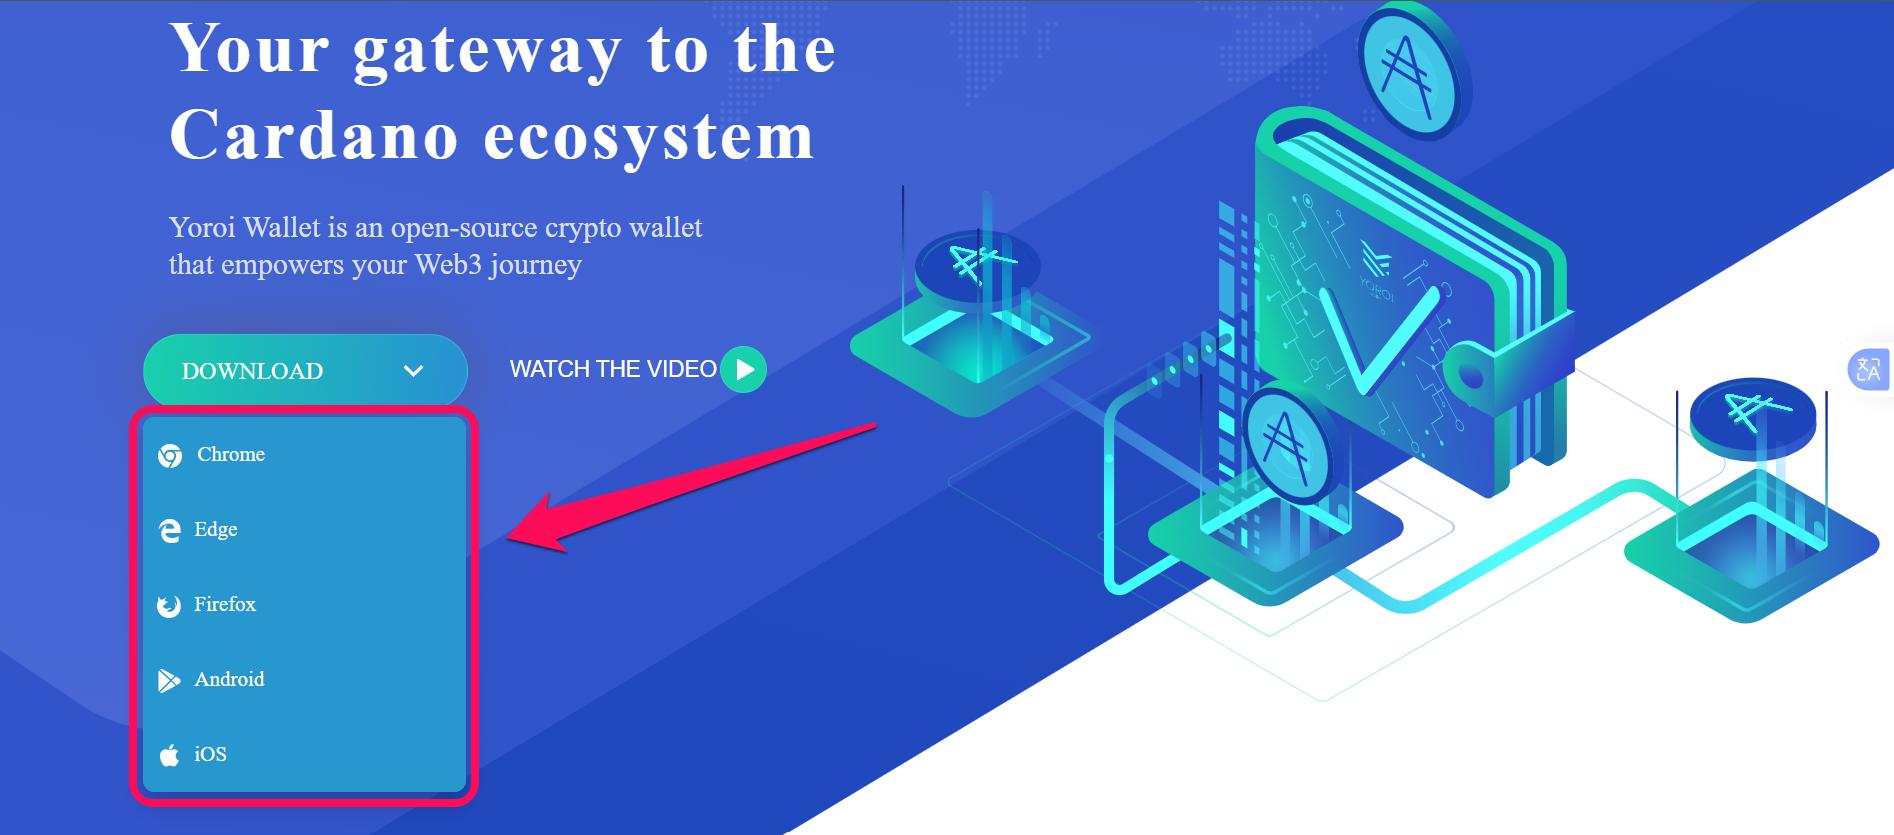
Before you begin, understand that the Yoroi wallet has desktop browser extensions available for Google Chrome, Microsoft Edge, Firefox, and other Chrome-based browsers. Also, Yoroi has official mobile apps for Android and iOS. To download the app on your device, follow the steps below:
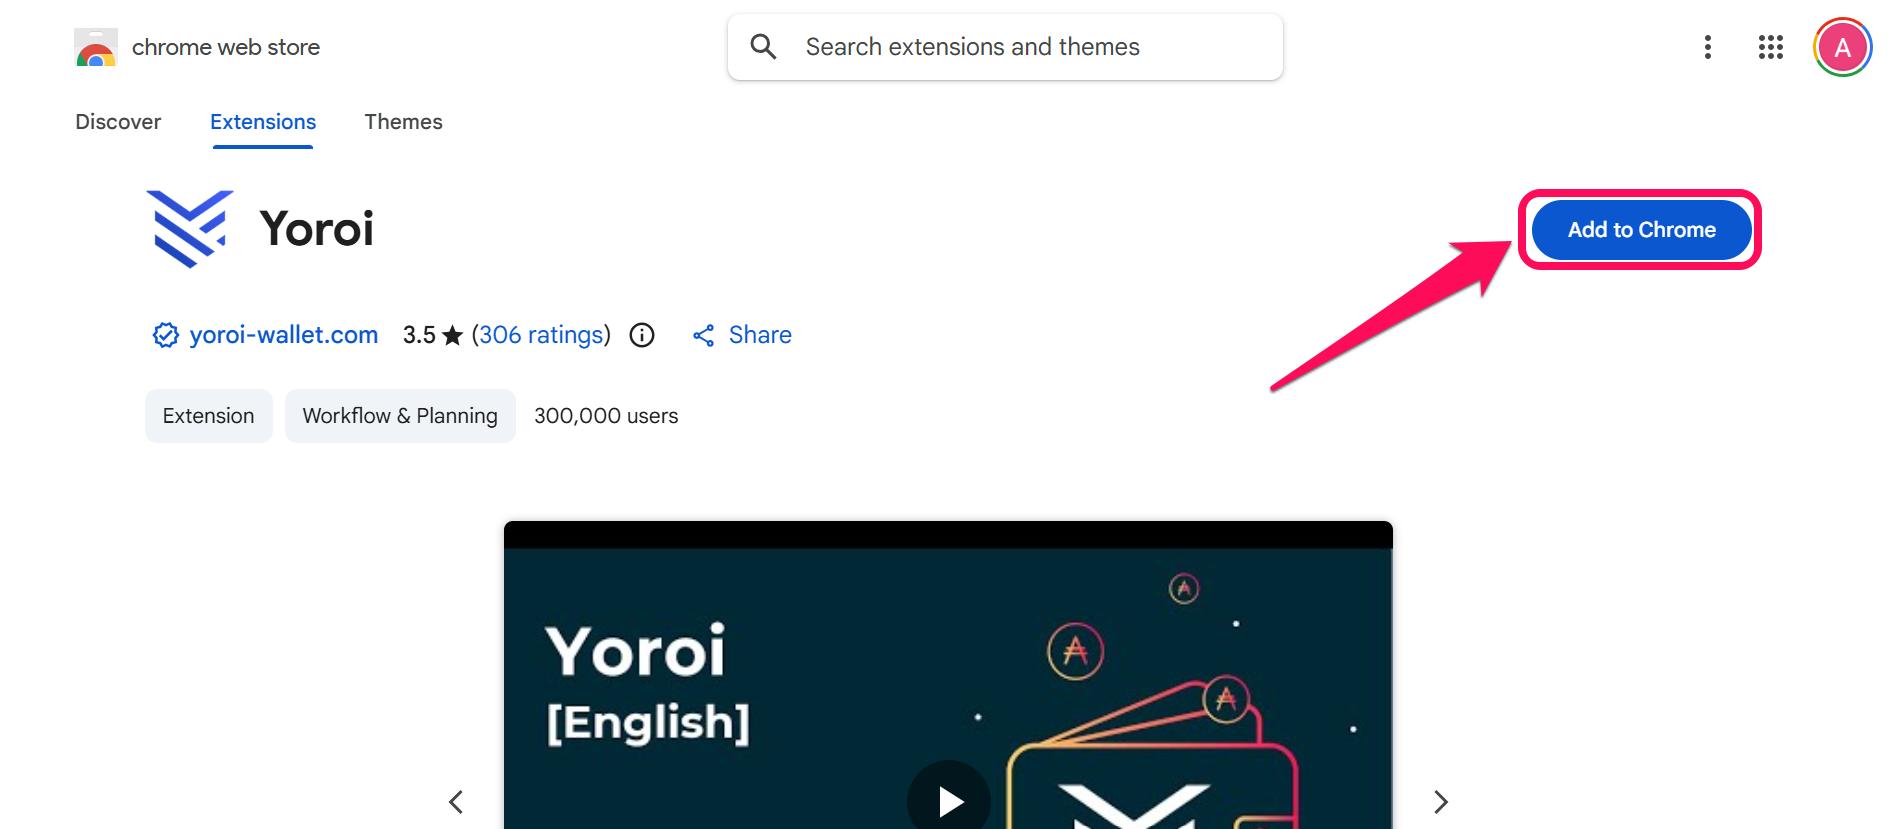
Step 1: Visit the Yoroi wallet web on your device’s browser.

Step 2: Click the Download button.
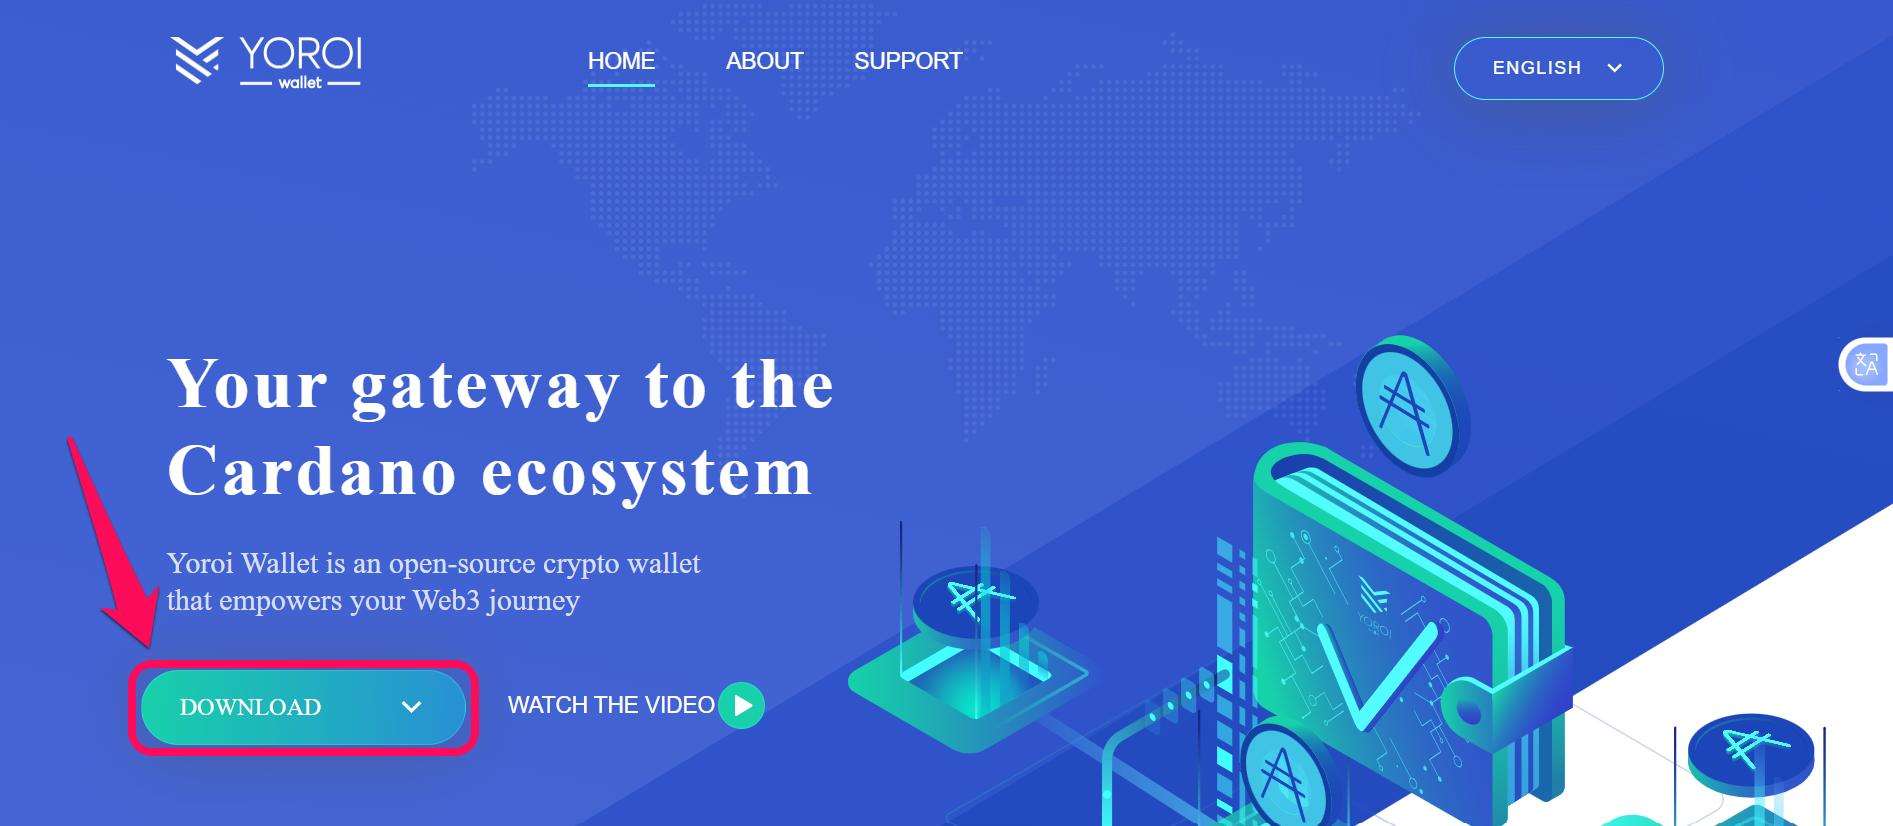
Step 3: You will find the option to download the application for various operating systems and browsers. Select your preferred option.
Step 4: Follow the prompt to either download or add to your preferred browser, then wait for the installation monitor to reach 100%.
Step 5: Launch the app/extension to get started.
Wallet Creation
Yoroi lets users create and manage multiple wallets in the app at once. You can import/restore existing wallets if you have created a Cardano wallet account in the past and want to regain access. The app also supports hardware wallets, so you can connect to one whenever you want. However, if you’re installing Yoroi for the first time, here’s how to set up your new wallet:
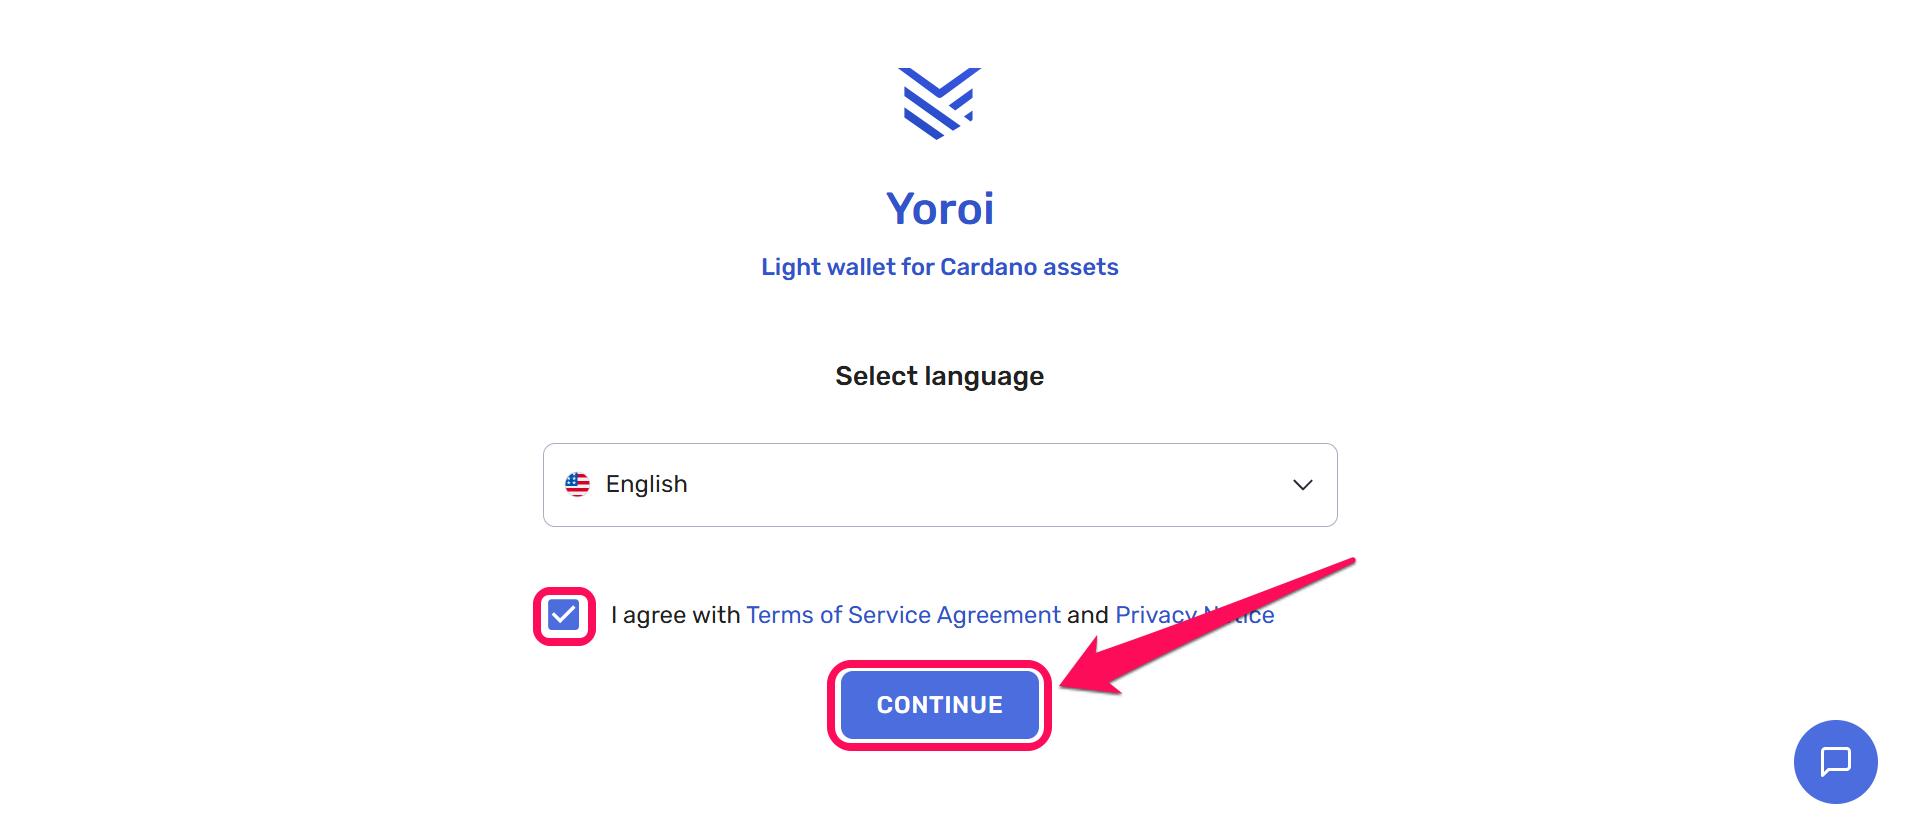
Step 1: Open the application or extension, select your preferred language, agree to the terms of service, and click Continue.
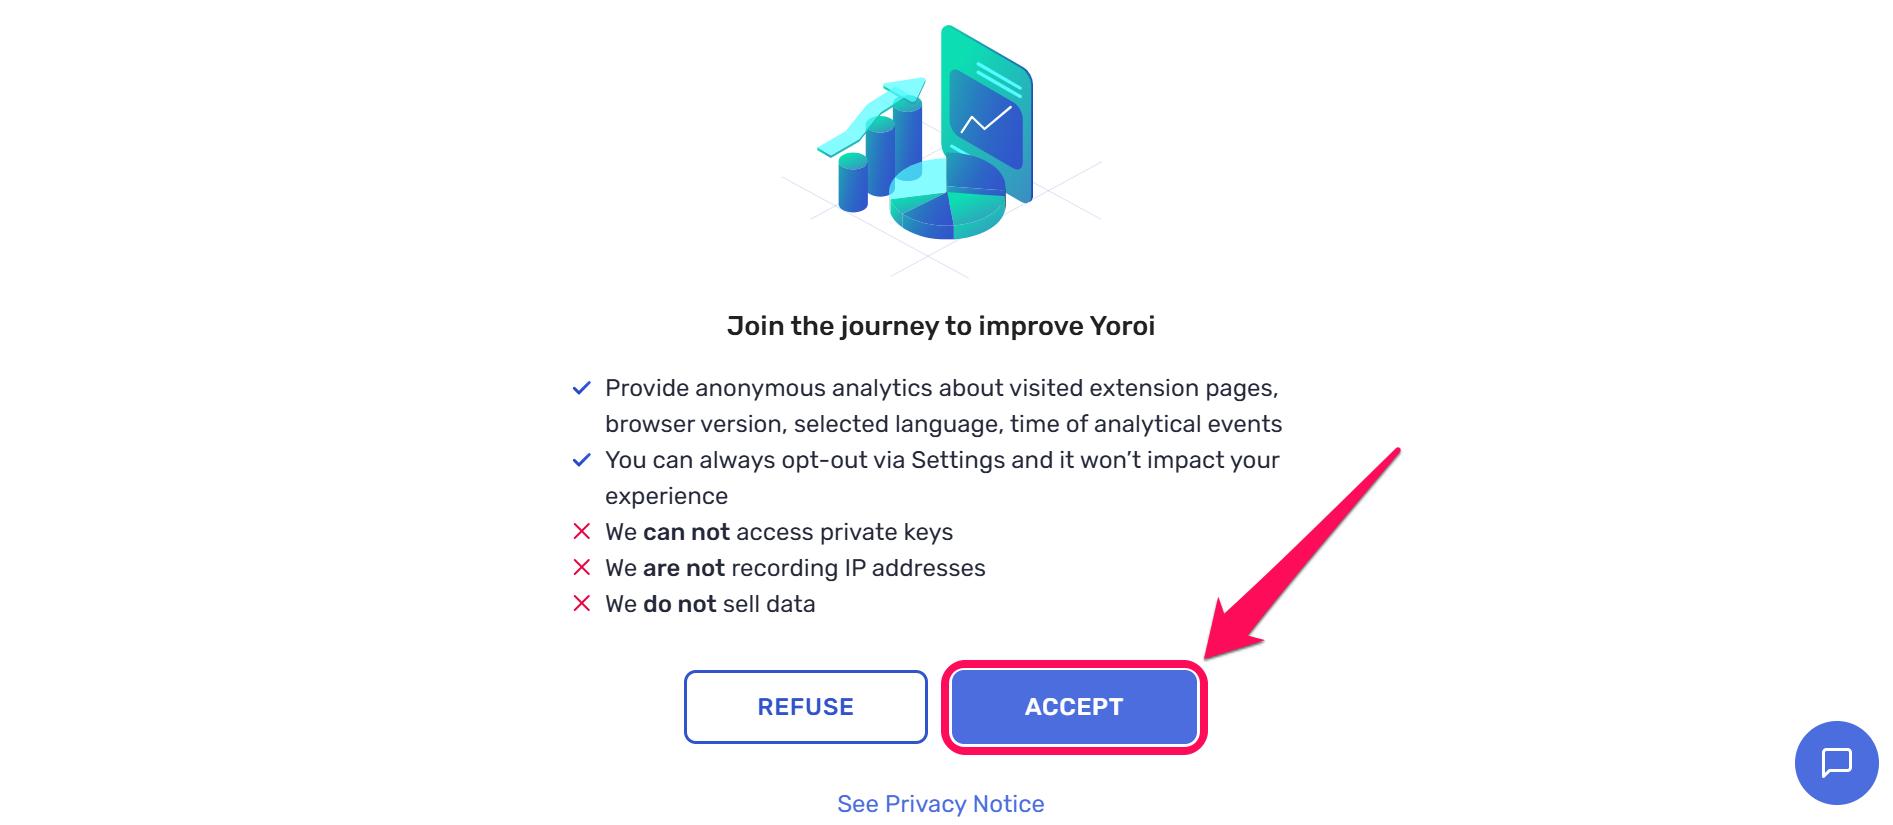
Step 2: On the next interface, click on Accept to acknowledge that you agree to Yoroi wallet’s privacy terms.
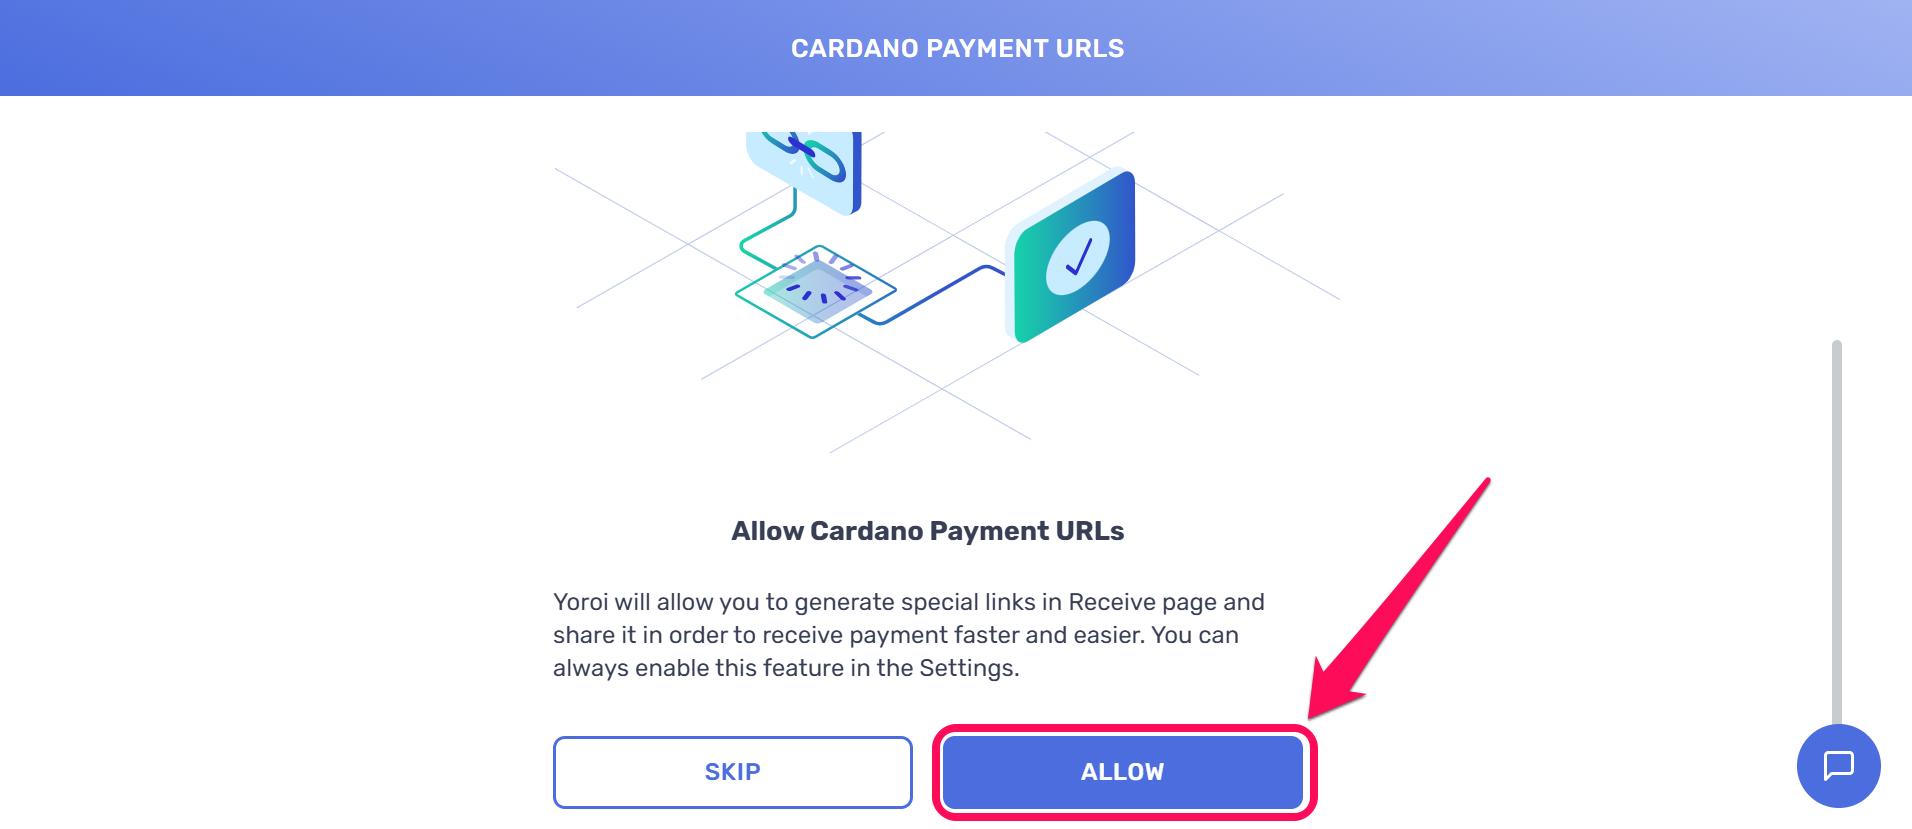
Step 3: Click Allow if you want to always generate special links on the Receive page to get payments faster.
Step 4: Click Create wallet to begin setting up.
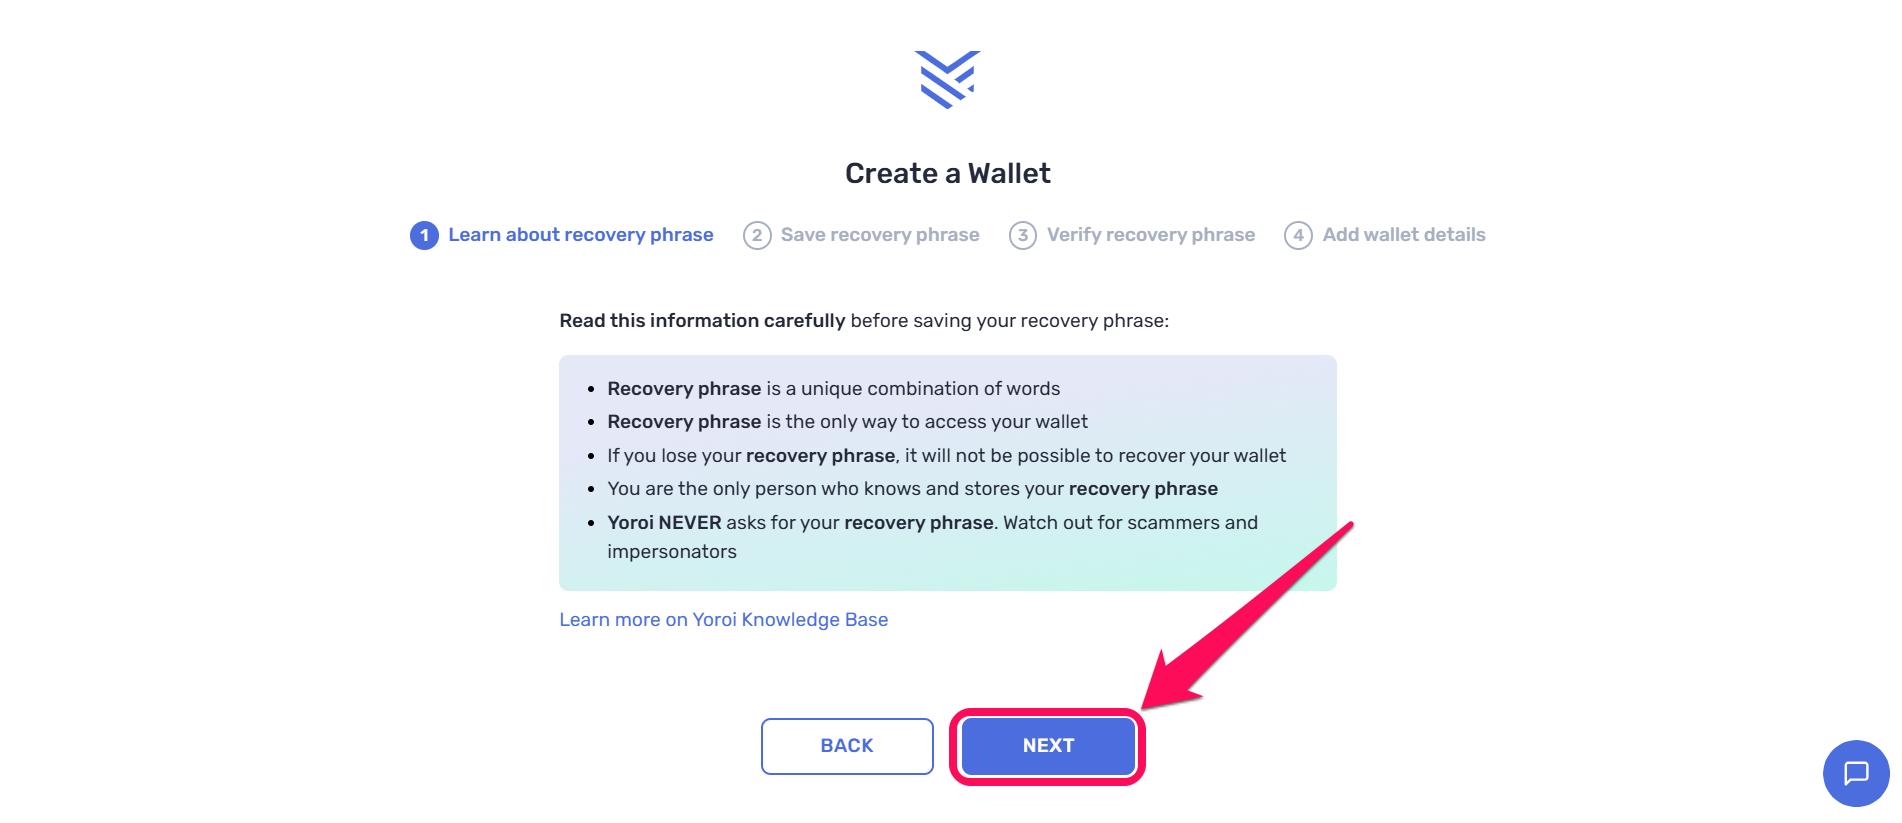
Step 5: Learn about the Yoroi Wallet recovery phrase and click Next to proceed.
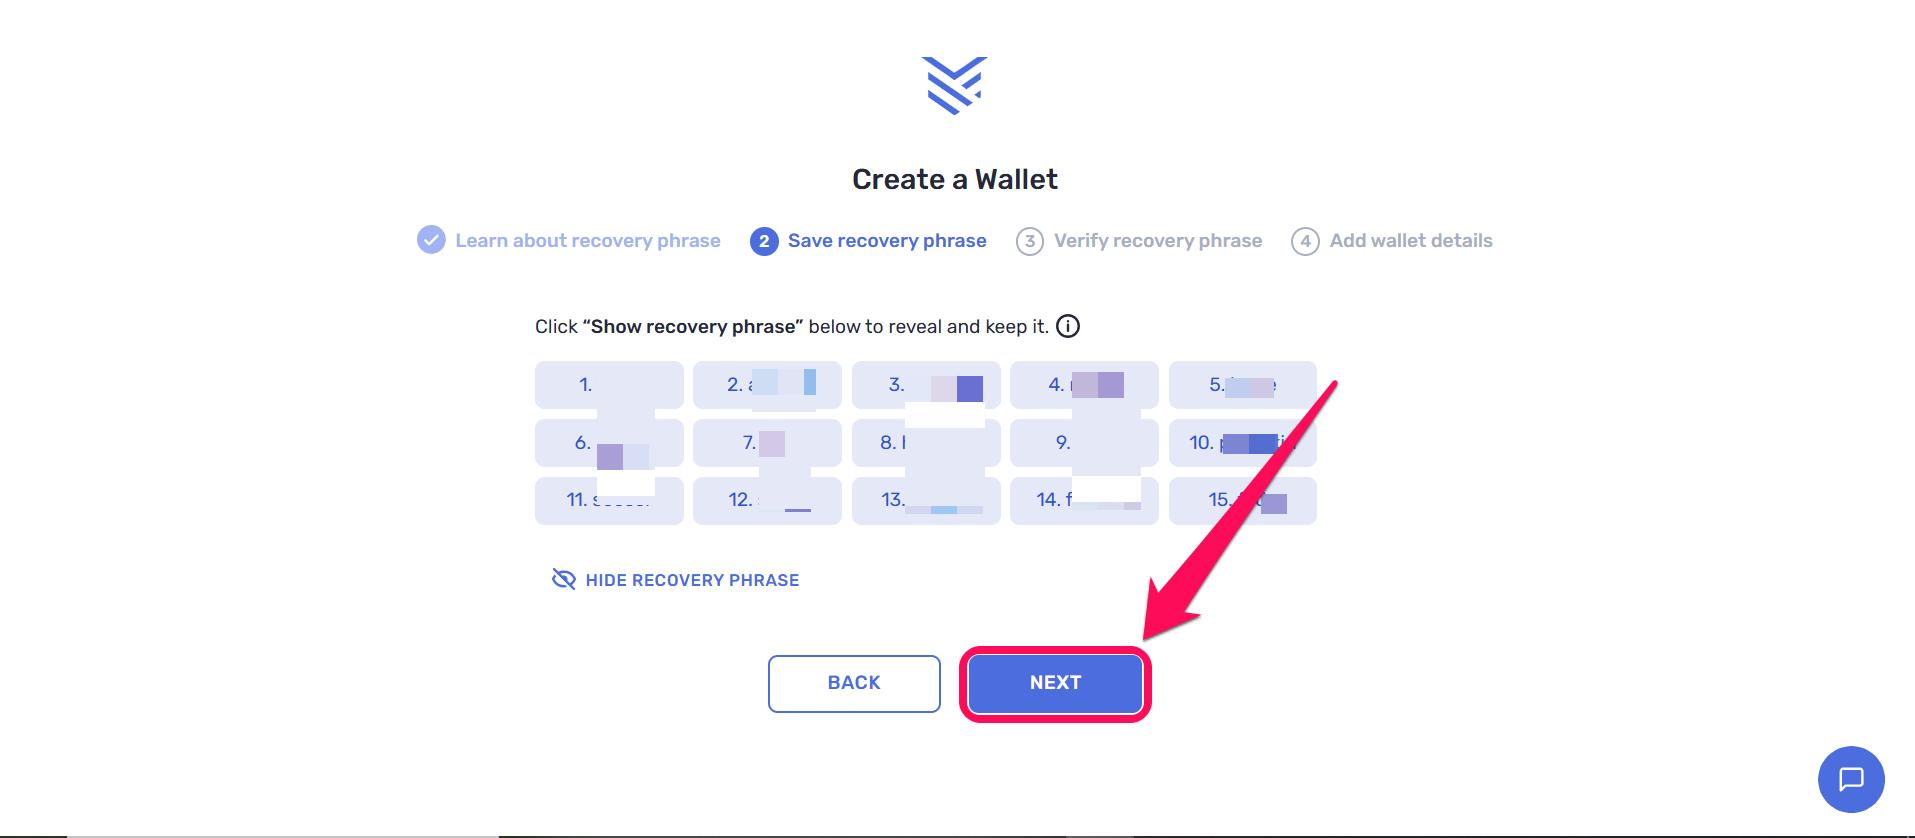
Step 6: Reveal and write down your 15-word recovery phrase on paper. Those words will only be shown to you once, and they are the only means to recover the wallet.
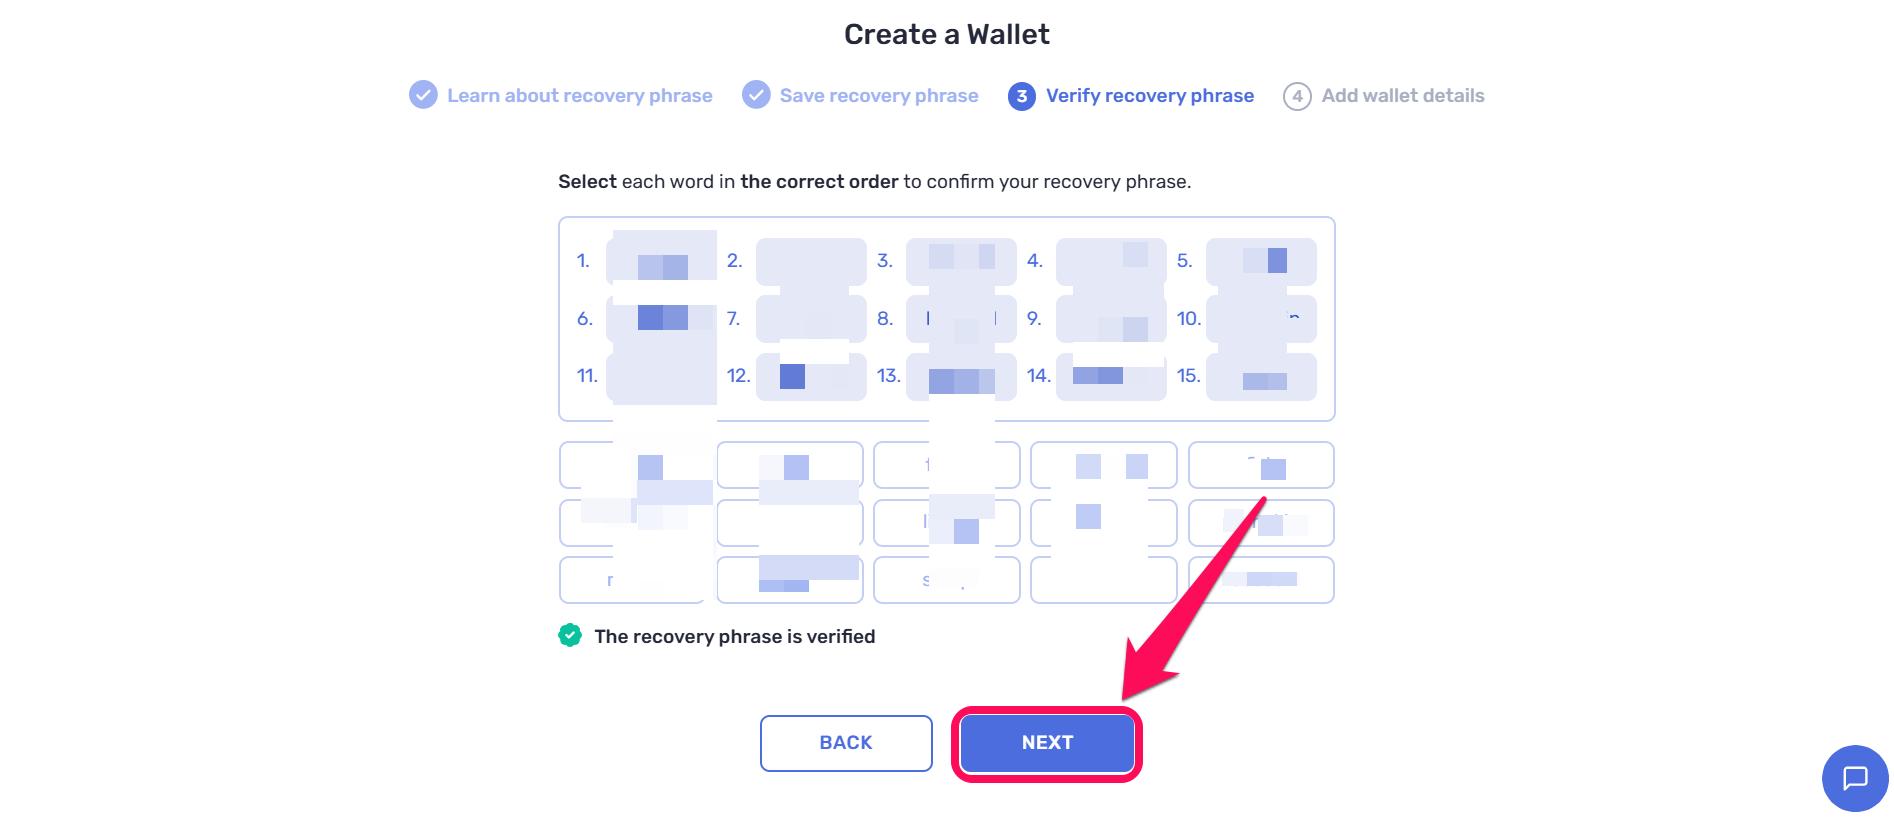
Step 7: Verify the secret recovery phrase to confirm it’s backed up, then click Next.
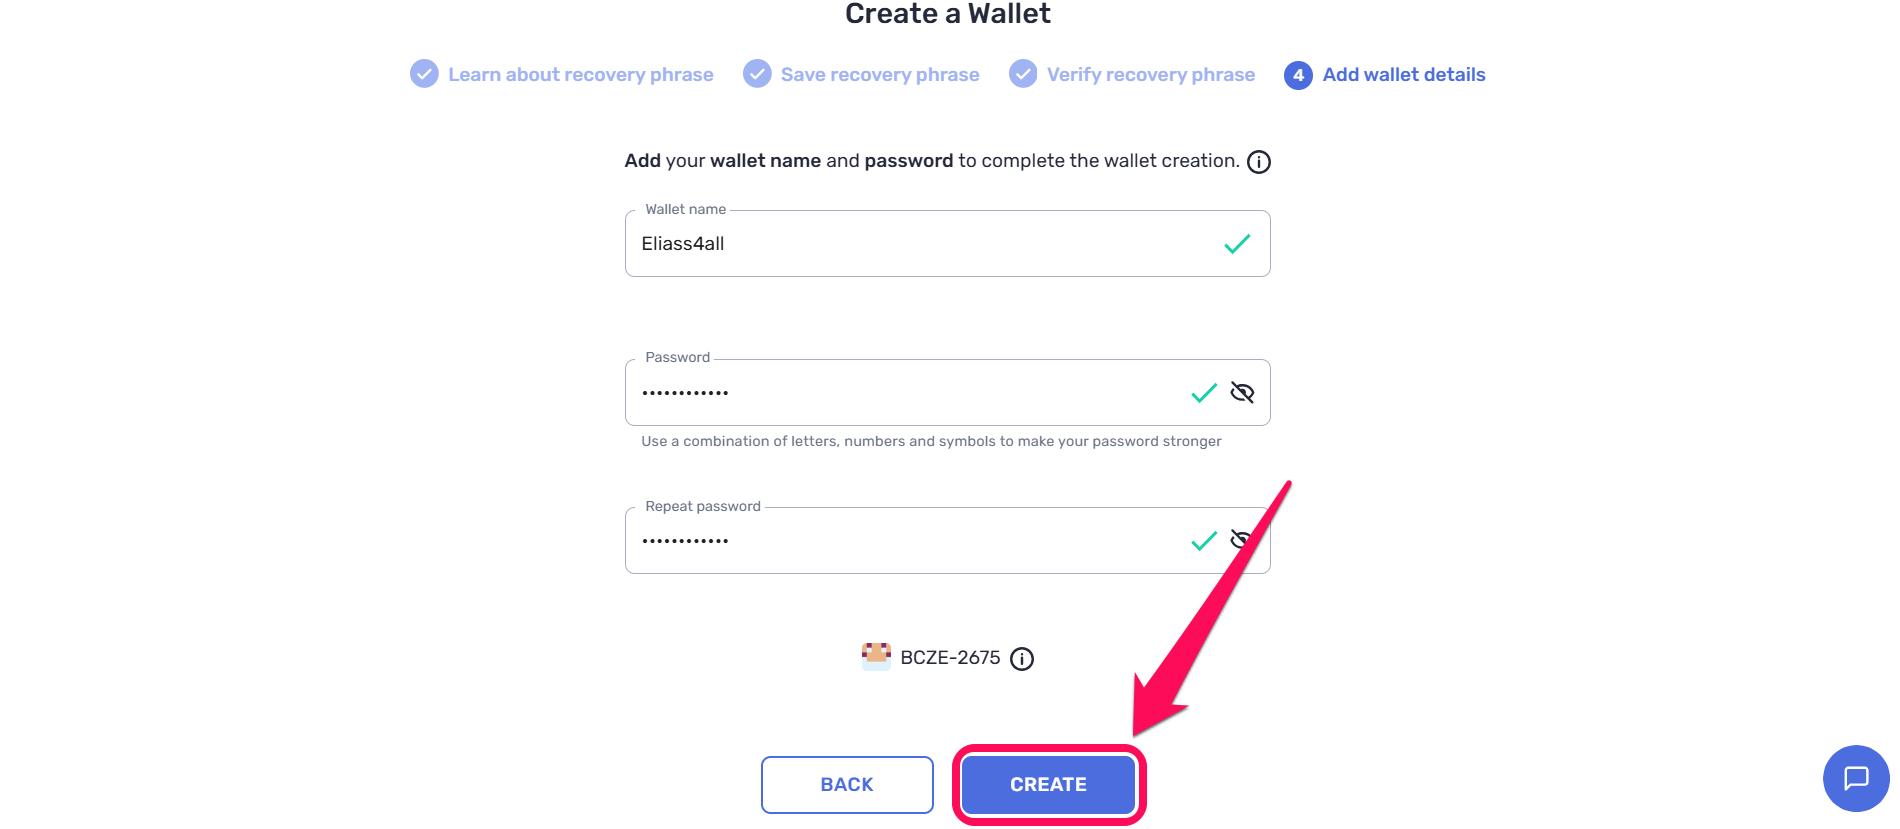
Step 8: Provide a wallet name and set up a strong password for the account. You’ll need to enter the password whenever you try to make a transaction, so never forget it. Finally, click Create to complete the setup.
Quick Tour of the Yoroi Wallet
Yoroi wallet’s sleek interface simplifies web3 for users looking to explore the Cardano network. The wallet connects to the blockchain and lets you buy, send, and receive tokens via quick-access tabs displayed after creating a wallet. The home dashboard shows your ADA balance, native tokens, and NFT gallery.
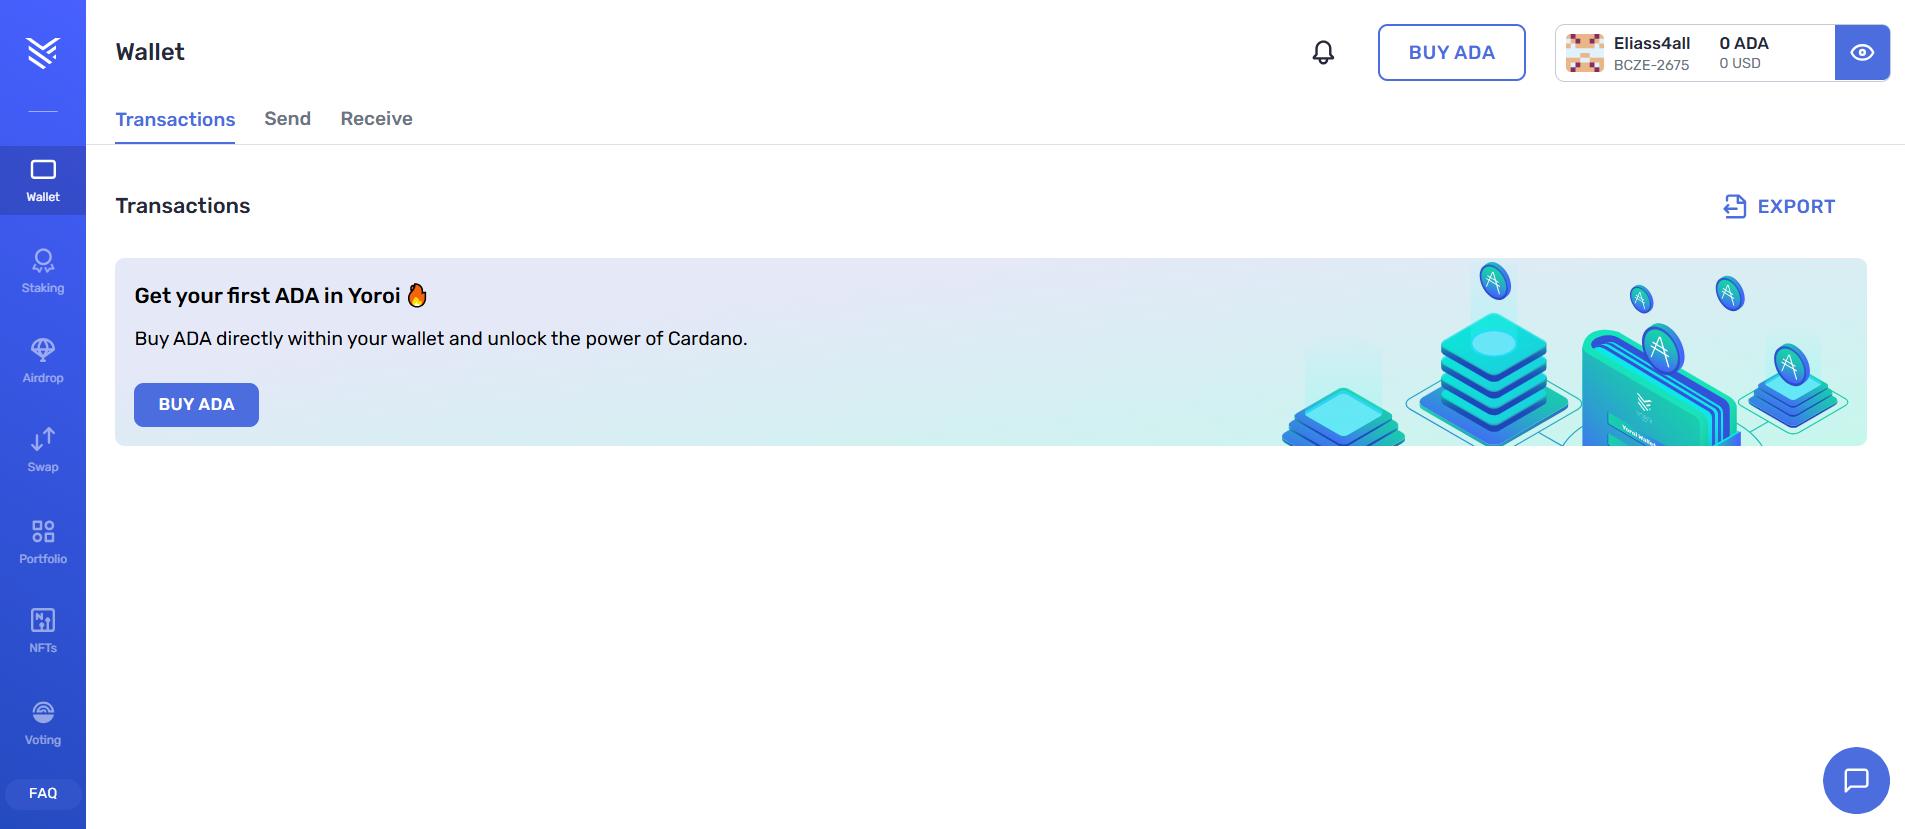
Yoroi also features the dApp connector to link your wallet to exchanges and marketplaces. The delegation center lets you browse stake pools, delegate ADA, and track your earnings without leaving the app. Additionally, users can make necessary tweaks in preferences and security options via the settings page represented by the gear icon.
Bottom Line
Getting started with the Yoroi wallet remains one of the easiest ways to interact with Cardano, especially for beginners. It removes the heavy technical requirements for Web3 and keeps things simple in a sleek, user-friendly interface. Once you’re familiar with Yoroi’s lightweight architecture, the next logical step is to set up a full node wallet to access more advanced Cardano features. Find out how to get started with the Daedalus wallet, then combine it with Yoroi to get a balanced and broader range of features and experience in the Cardano ecosystem.
FAQs
1. How to withdraw rewards from the Yoroi wallet?
In Yoroi, you go to Staking and select Withdraw. You are then given an option to remain registered with your staking pool or not. There is no requirement to enter an address; only your spending password is required.
2. Why is my Yoroi wallet showing the wrong balance?
It’s probably just a Yoroi sync issue. Ensure your device is connected to a stable network, then restart or reload the wallet to resync. If you plug your address into cardanoscan.io, you will see your actual balance.
3. How do I receive crypto in Yoroi?
Go to the wallet tab on YoroI and click receive. There, you can see which ADA balances are on which receiving addresses. Share the correct address with the sender to successfully receive ADA tokens.