

The Cosmos ecosystem consists of several interoperable blockchains and appchains, all connected via the Cosmos main chain.
A Cosmos wallet allows you to explore Cosmos and any chains built with the Cosmos-SDK (Software Development Kit). Of all Cosmos wallets, Keplr is the most popular because of its simple UI and user-friendly features, like the option to back up your seed phrase to your Google Drive.
Read on to learn how to create a Keplr wallet for the Cosmos ecosystem.
Download the Keplr Extension
The first step to getting a COSMOS ecosystem wallet is to download the extension from the Chrome web store.
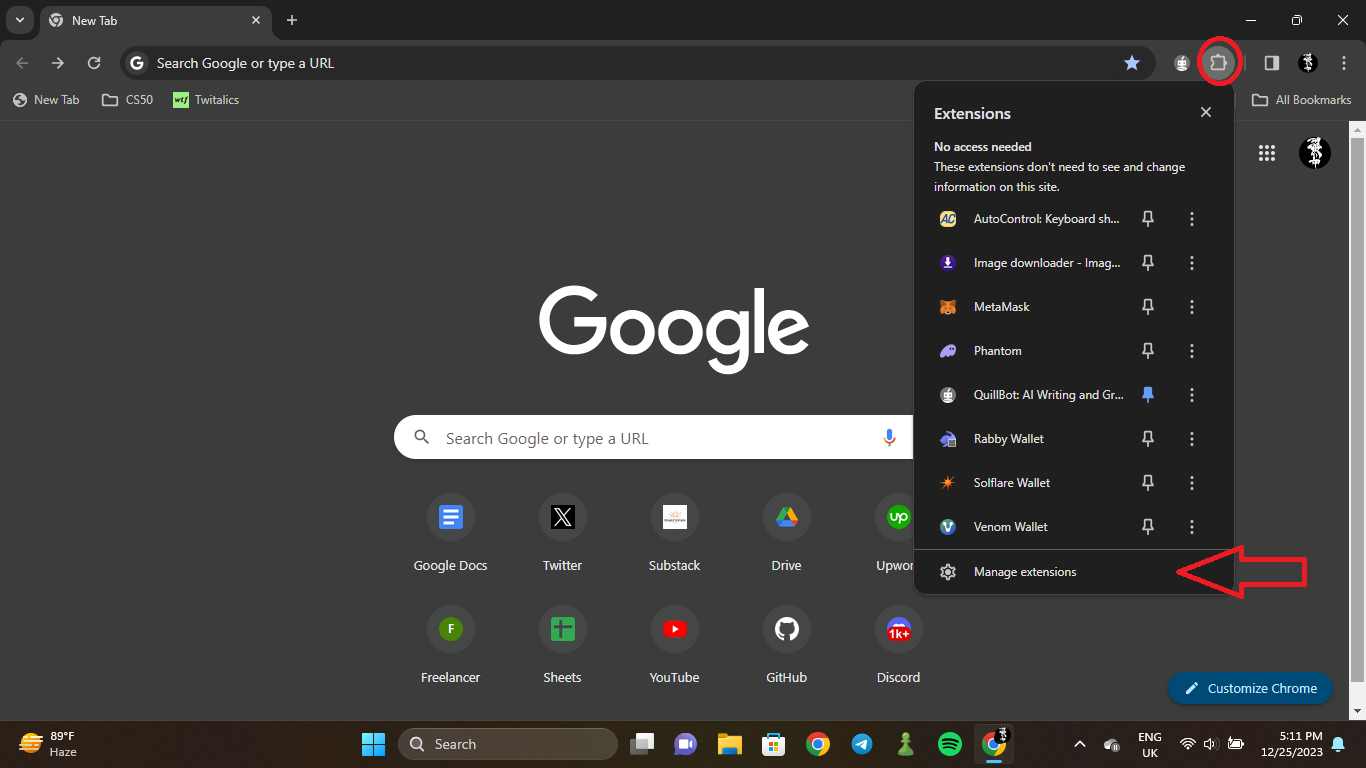
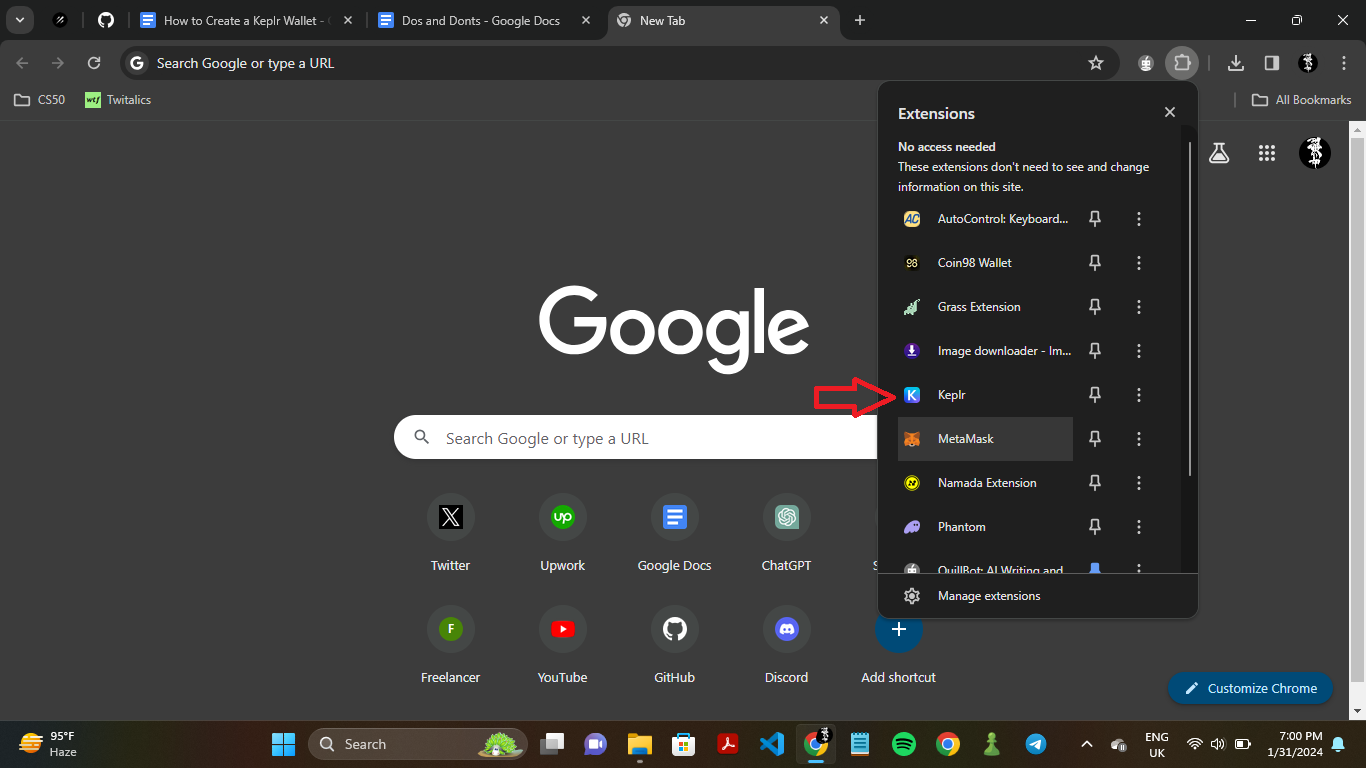
The webstore can be accessed via the extensions menu.
Click on “Manage Extensions.”
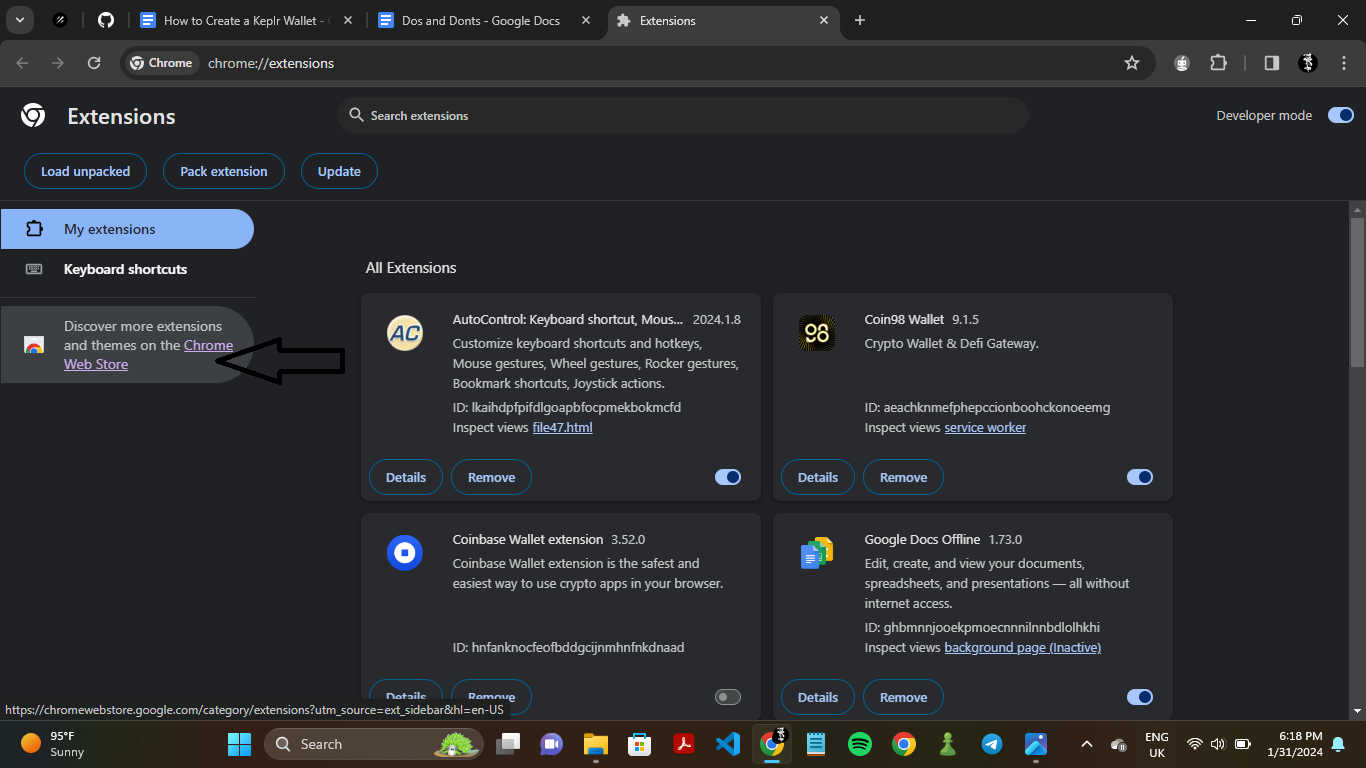
From there, click on “Chrome Web Store.”
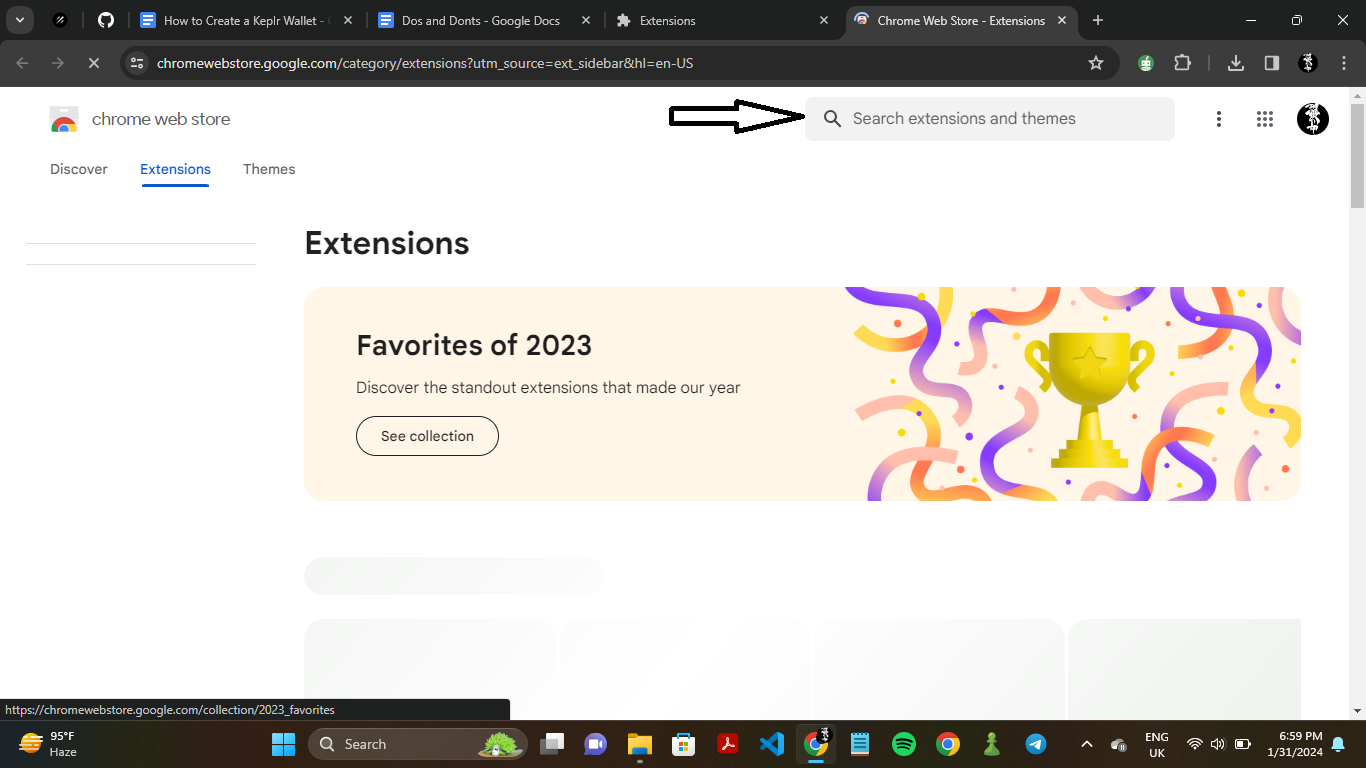
Search for Keplr. Make sure it’s the correct extension, as obtaining a malicious extension could result in a loss of funds.
Clicking on Keplr should bring you here:
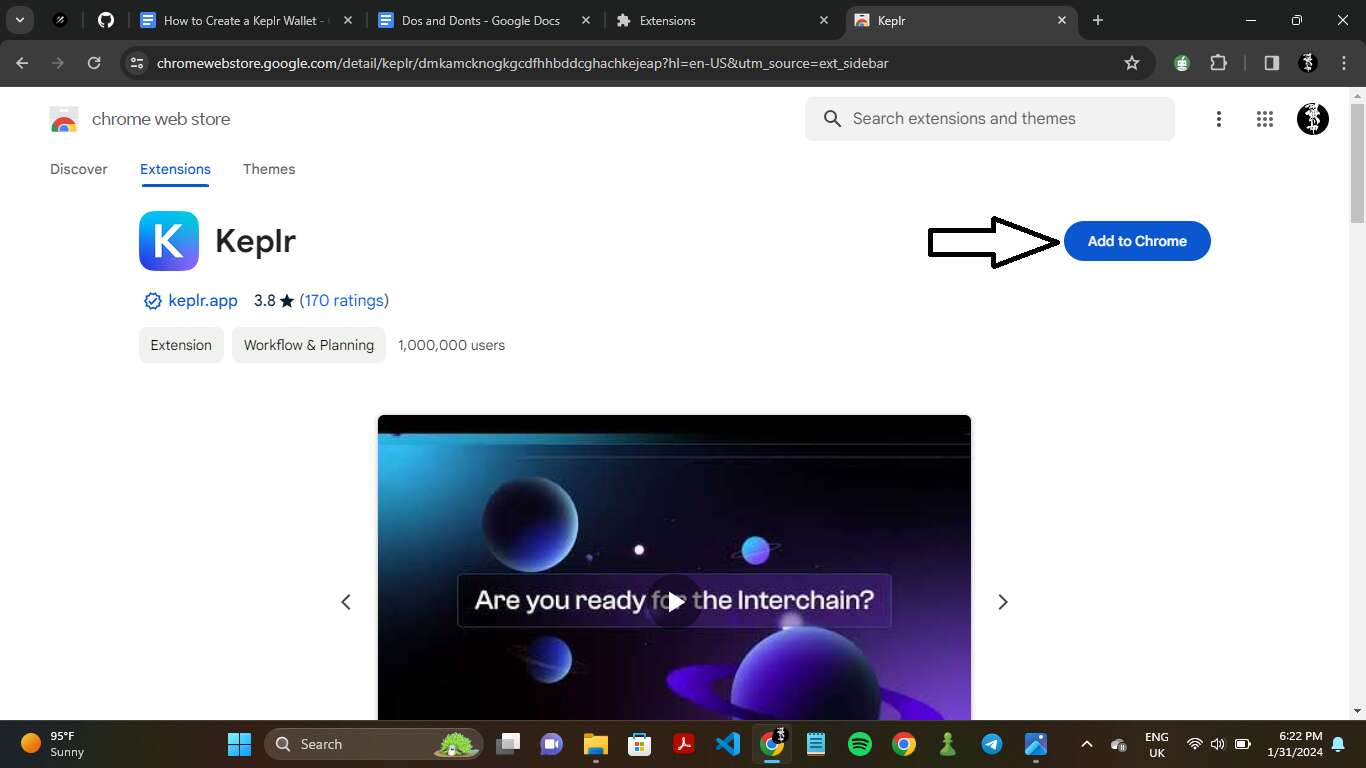
Click “Add to Chrome.”
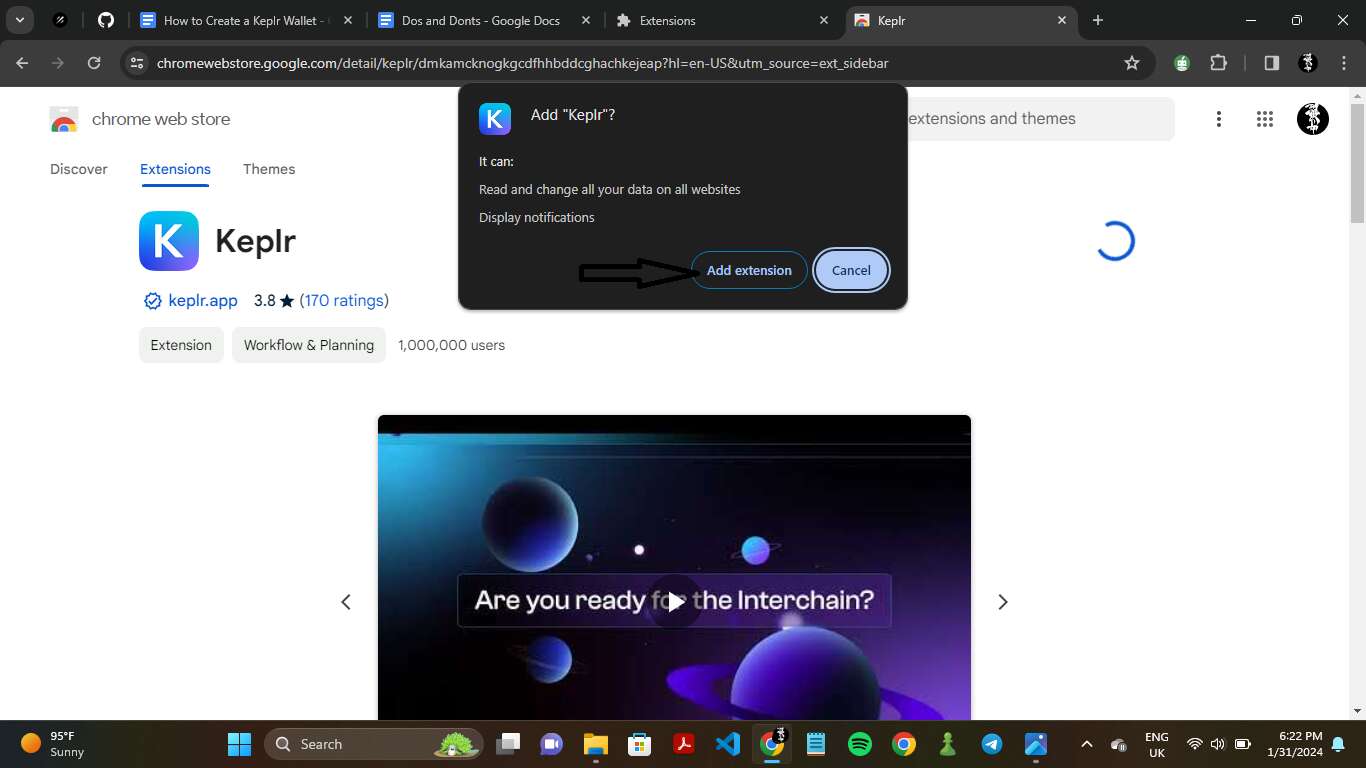
Click “Add Extension.”
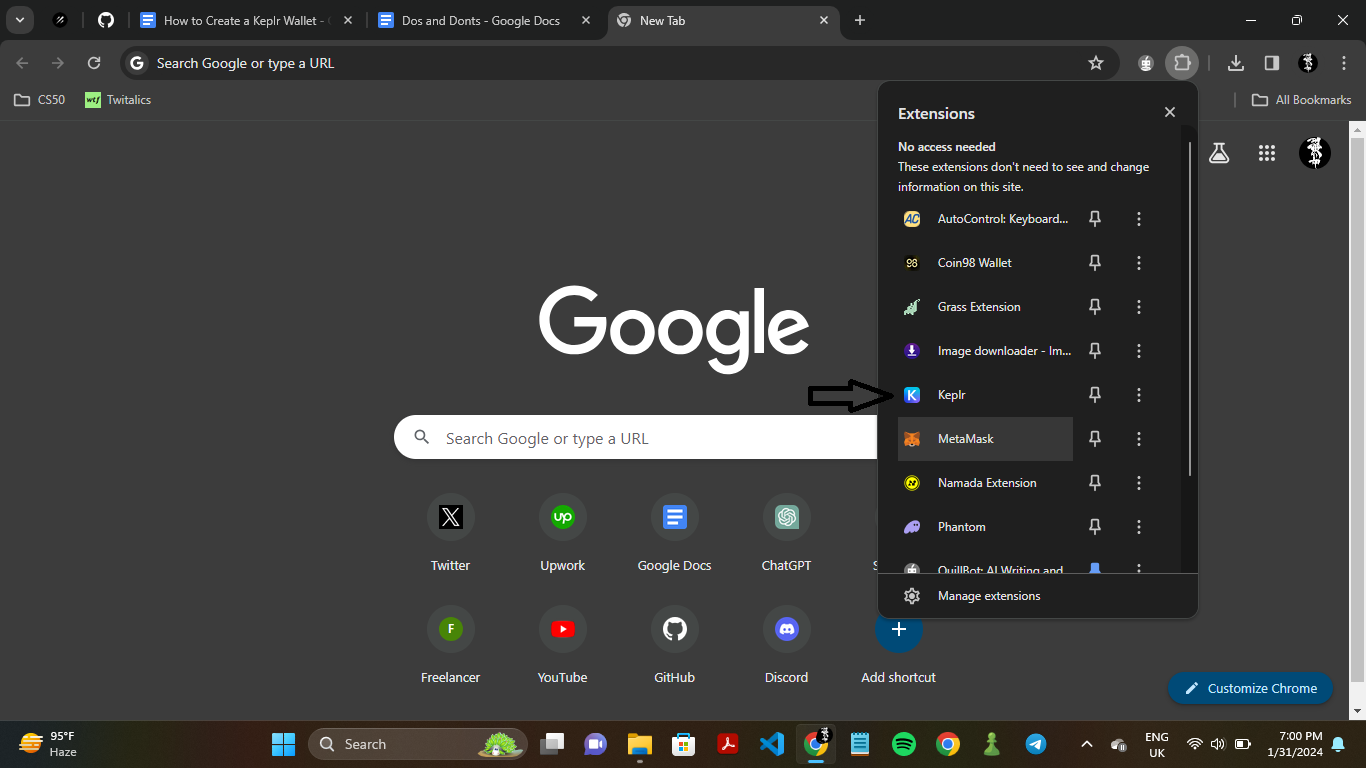
Open the extension
Upon downloading the extension, it should open automatically but in the event that it does not for any reason, the application can be launched from the extension menu on your web browser.
Select Create a new Wallet
Upon opening the wallet for the first time, you’ll be taken to a webpage that should look similar to this.
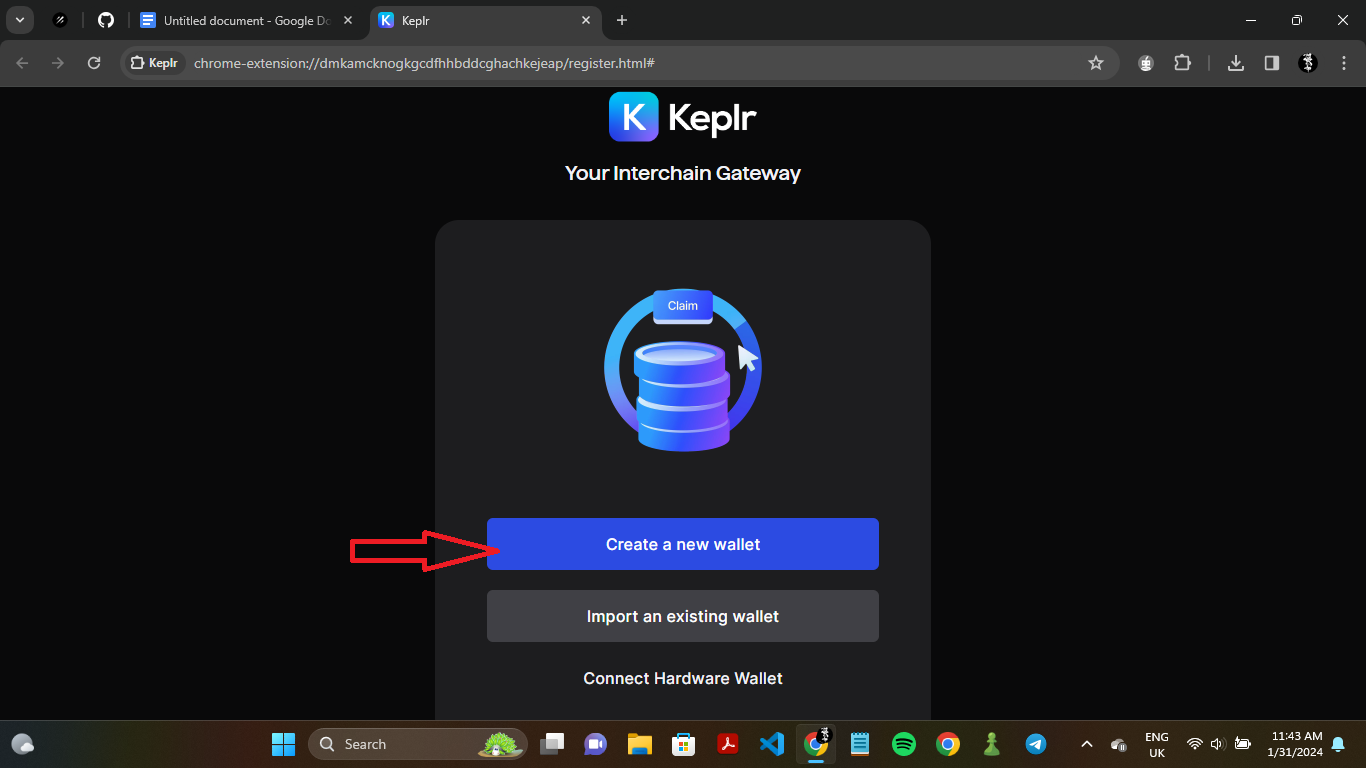
If you previously owned a COSMOS wallet, you can import it by clicking the “Import an existing wallet” option. To create a new wallet, click the “Create a new wallet” option.
To connect your hardware wallet to the extension, click the “Connect Hardware Wallet” option.
This option allows you to perform transactions with your hardware wallet without compromising on security.
Choose between seed phrase or Google Backup
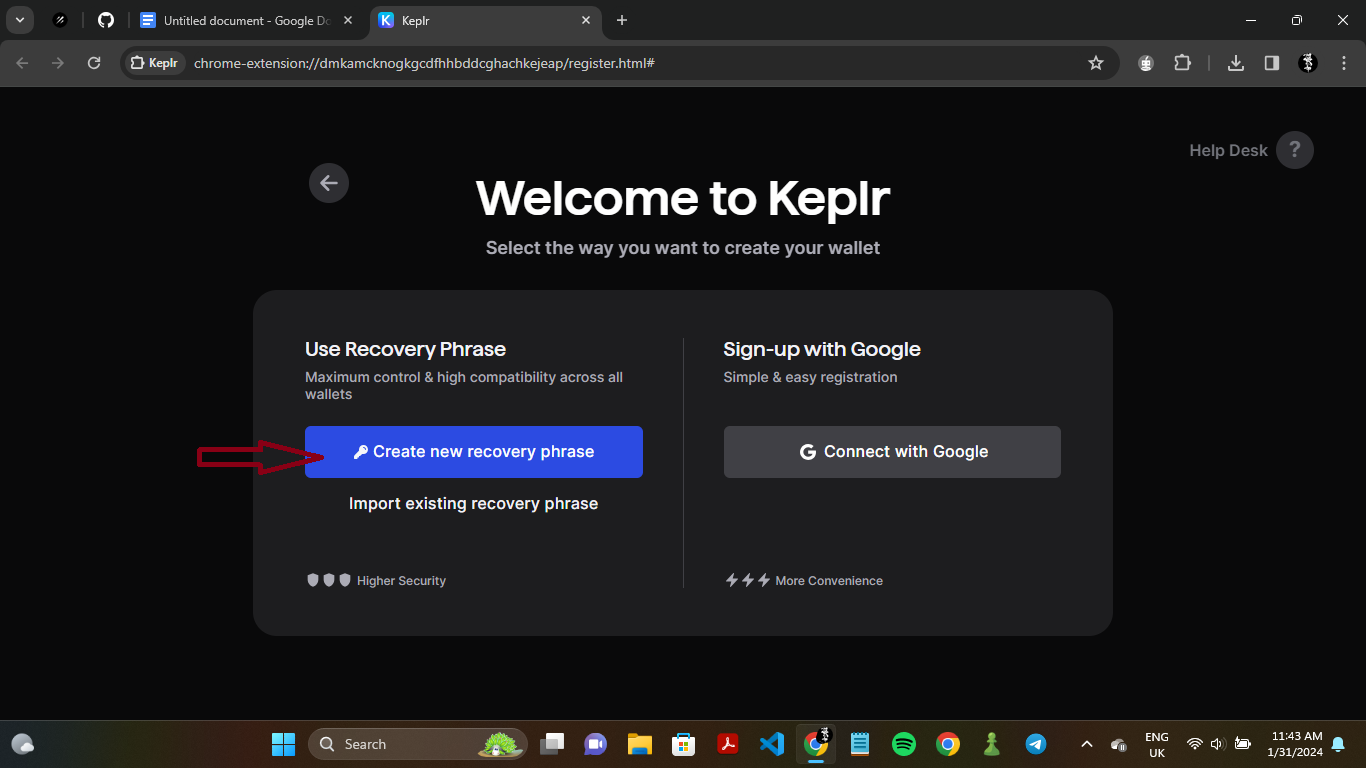
At this junction, you’ll be presented with two choices, store your seed phrase manually or allow Keplr to back it up on your Google Drive.
Storing by yourself is considered best practice as it reduces the chance of exposure.
I personally keep two copies, one in a secure location and the other wherever I currently live.
The downside to self-custody is that you are completely responsible for the seed phrase and if it’s ever lost, all funds associated with it are lost as well.
Backing up to Google Drive is a recent development and makes the process of wallet creation and protection significantly easier. The only disadvantage is that anyone who has access to your e-mail address has complete access to the seed phrase.
In the event that you accidentally delete the seed phrase file, it is also permanently lost.
Copy seed phrase
If you choose the recommended option (Seed Phrase),
You’ll see this screen:
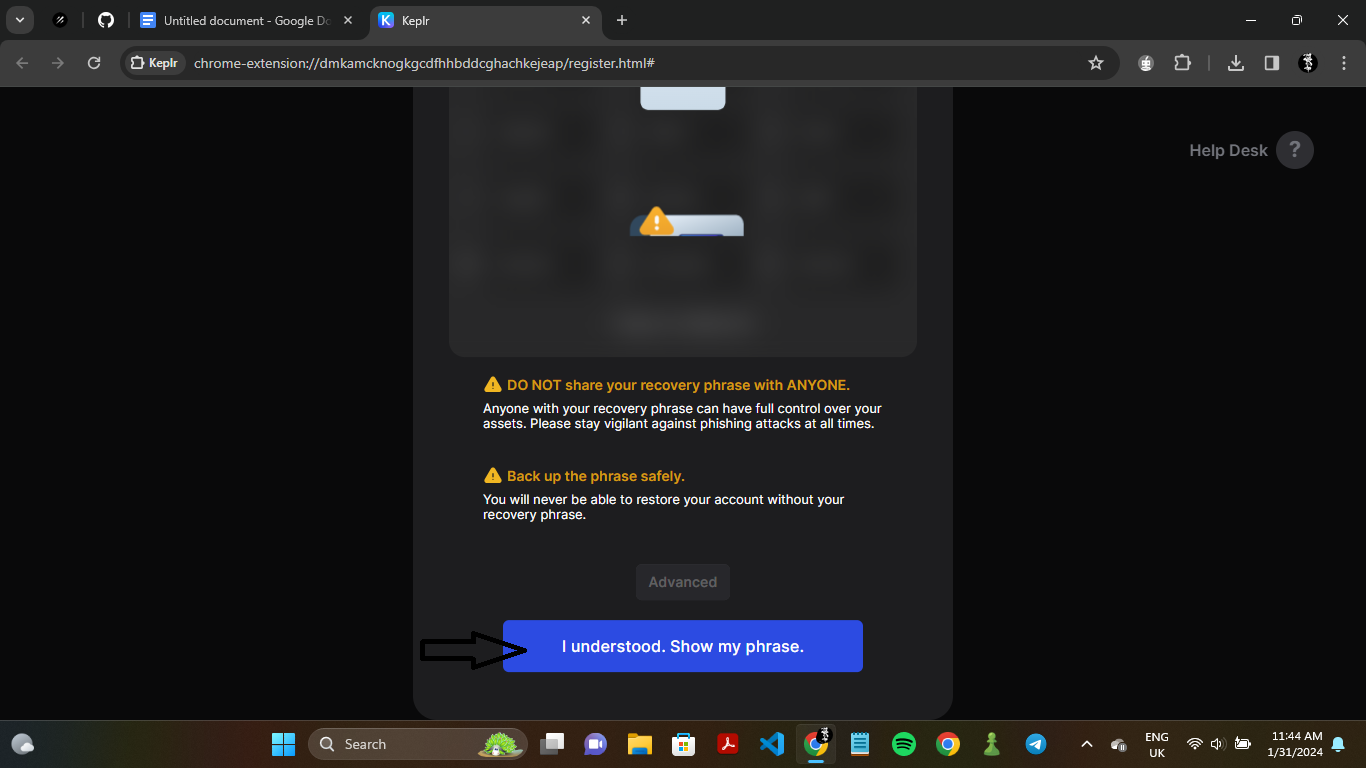
Ensure no one is looking over your shoulder before clicking “I understood. Show my seed phrase.”
Upon clicking this, your seed phrase will be revealed.
You have the option to copy it to a clipboard or manually write down the 12 word seed phrase.
NOTE: I will reveal the seed phrase I used for the purpose of this demonstration but your seed phrase must be kept secret.
This is my seed phrase:
cargo absurd congress execute idea ordinary crawl hotel shove happy assume seed
Validate that you’ve stored seed phrase and create a password
After you copy your seed phrase and indicate that you’ve copied it, you’ll be met with this screen.

The purpose of this screen is to validate that you’ve indeed stored the seed phrase.
NOTE: The password created only encrypts your wallet application on your device; your wallet can be accessed without it if the malicious entity has your seed phrase. Keep your seed phrase safe!
At this step, enter the required words and choose a password. The required words are random so do not worry if you’re asked for different words than the 7th and 10th.
Also remember your password, as forgetting or losing it means you’ll need to delete and import your wallet to access it.

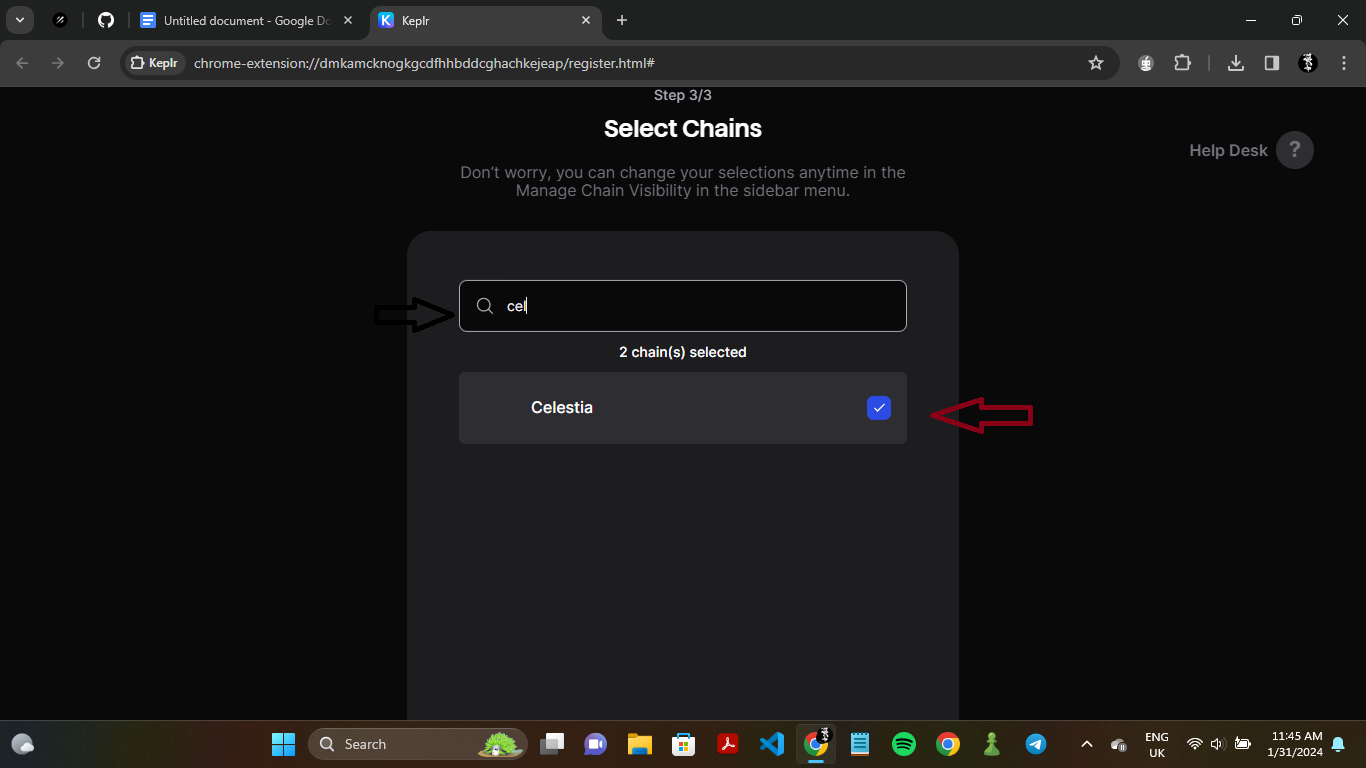
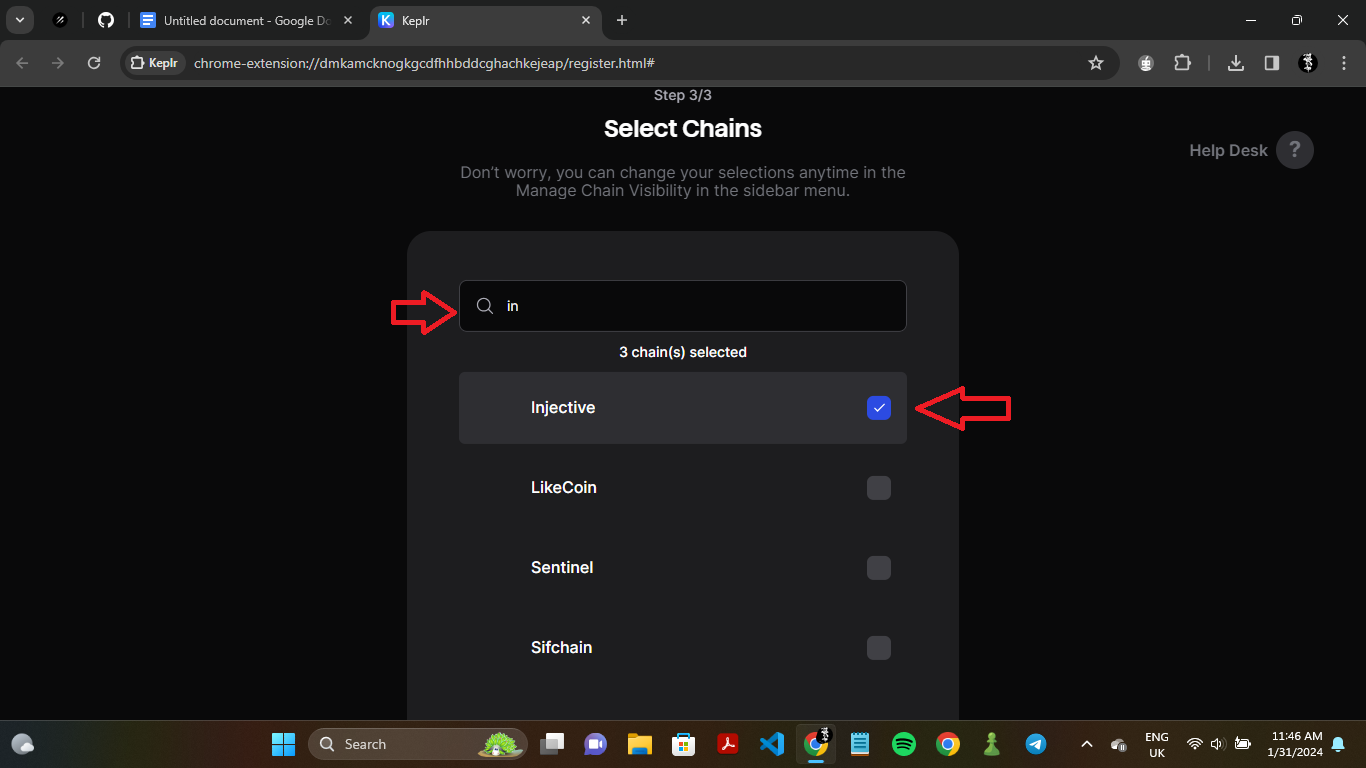
Add chains; I’ve added TIA and Injective
The next step is to add chains.
As mentioned earlier, Cosmos is unique to other blockchains as it serves as a central hub for multiple blockchains. As such, you can add multiple chains to the same wallet since they all share a single central hub – the COSMOS main chain
You do not need to add any additional chains but I’ve added Celestia (TIA) and Injective (INJ) as they seem to be part of this cycle’s “alt meta.”

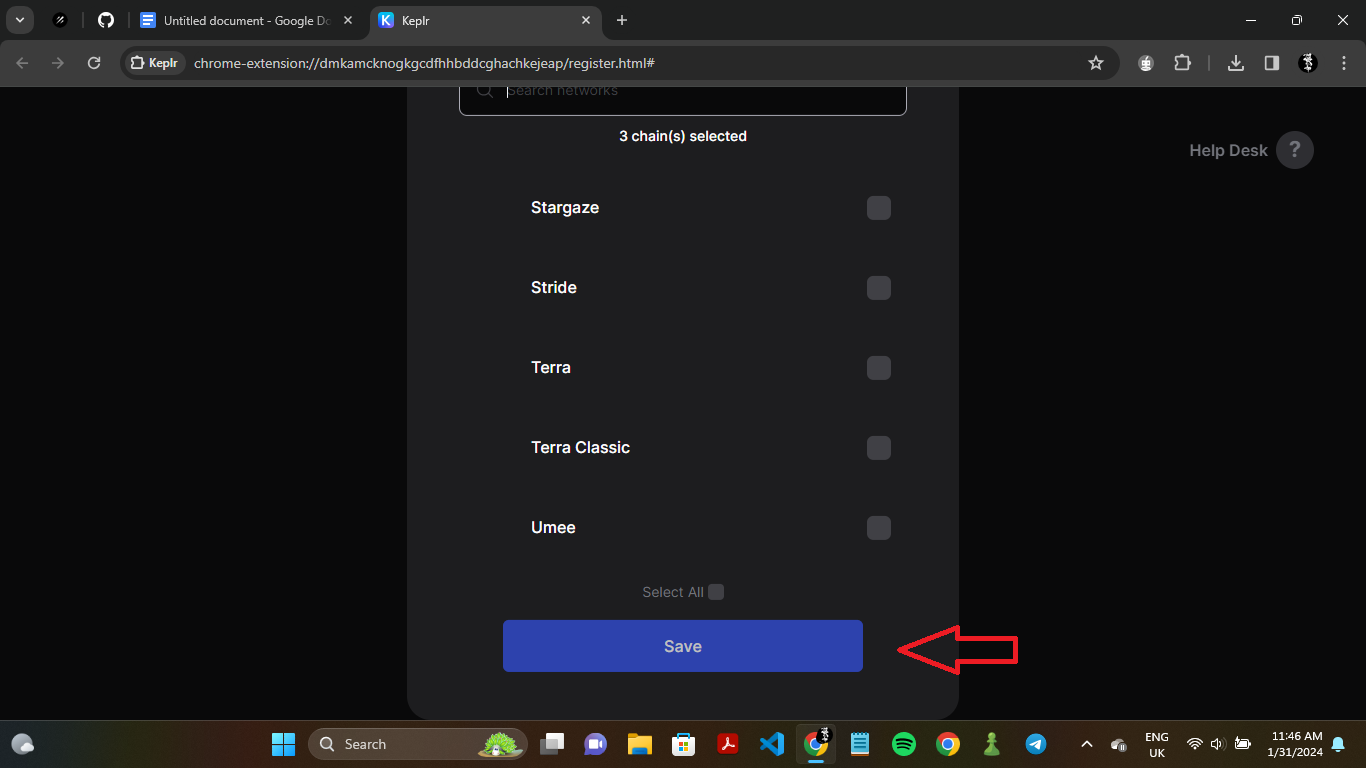
Save
After adding all the desired chains, scroll to the bottom and click on save
Finish
After completing this, you’ll be met with this screen.
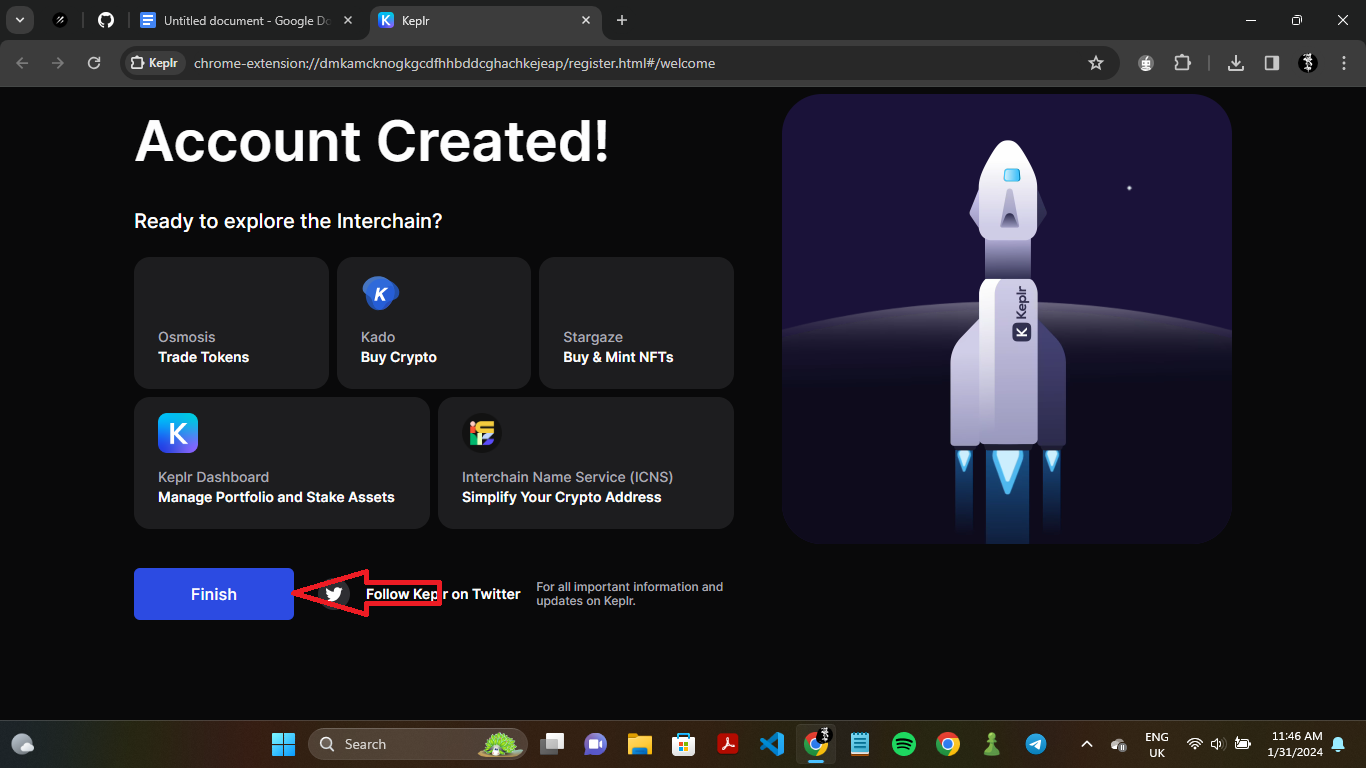
Click “Finish,” and with this, your wallet has been created.
With that, you now have the Keplr wallet installed, and you can use it on any COSMOS ecosystem dApp or related website, provided you’ve added the prerequisite chain.
You can now access the extension via your extensions menu.
Your wallet should look like this:
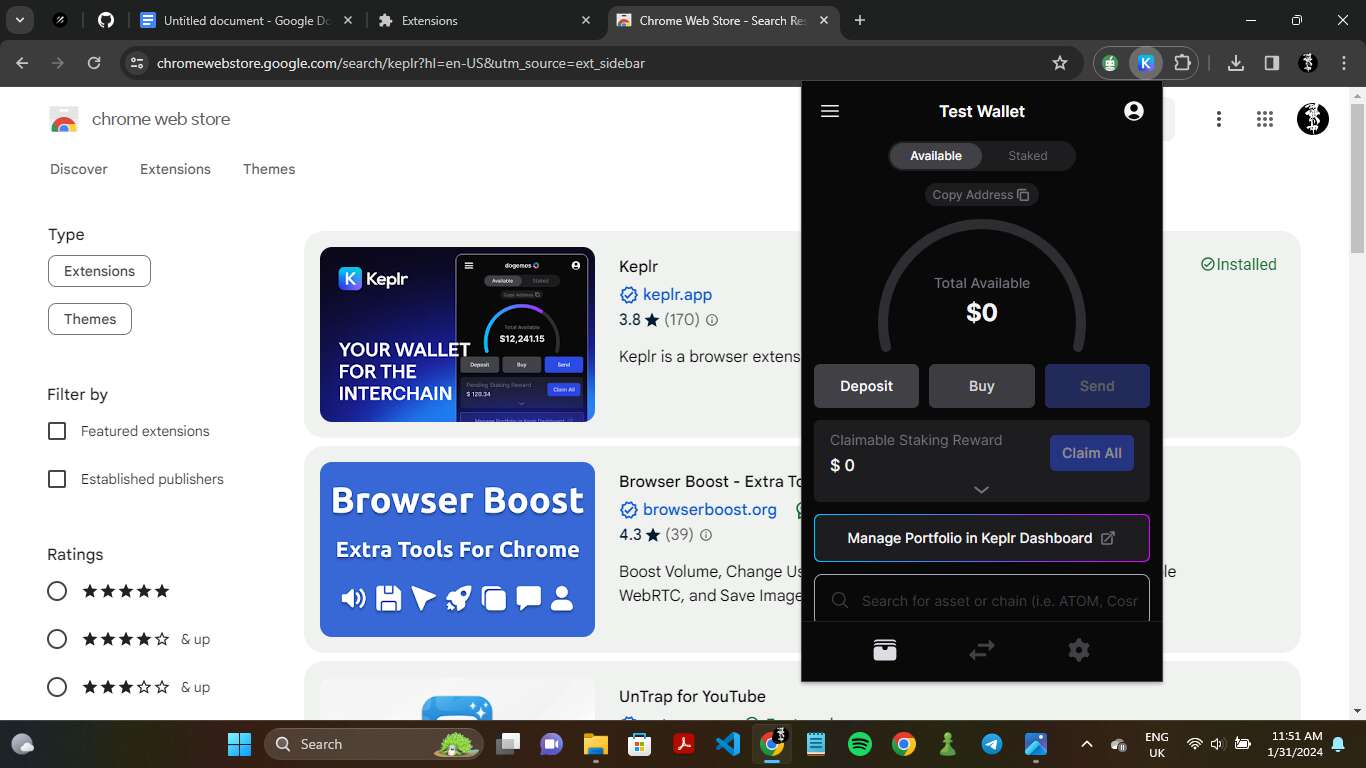
You can copy your address from the copy address button and you can see your cumulative balance in the total available section.
With that, you’ve created a Keplr wallet and are ready to use the Cosmos ecosystem.