


In this guide, we will look at how to bridge from the Base (L2) to the Degen L3
What is Degen
Degen is the pioneer of the “memecoin-chain” concept. It is a layer 3 built on the Base layer 2.
The founder, Jacek Trociński, explains that the chain is not supposed to innovate but rather provide an application layer for memecoins and other such usecases. “I think it makes a lot of sense for us to do some level of customizations, but not necessarily innovate in the way that say Blast is innovating or OP is innovating.”
At its base, Degen is a Layer 3 built as an Arbitrum Orbit chain; it uses the Base L2 as a settlement layer, and AnyTrust for data availability.
The concept of layer 3s is relatively new but they are not fundamentally different from layer 2s, they are simply a level higher. The basic idea is that layer 3s scale layer 2s by separating transaction execution and settlement. In this setup, transactions are executed on the layer 3 and settled on the layer 2. The layer 2 will eventually post this data back to it’s layer 1 but the layer 3 does not bother with this. It simply uses the layer 2 the same way a L2 uses the L1.
L3s can significantly improve blockchain performance and decrease congestion but there’s consensus that they are an unideal scaling solution.
In this guide, we will discuss how to bridge to the Degen L3.
How to bridge to Degen
The gas token of the Degen L3 is $DEGEN and so to use the Degen network, you must bridge to it.
The bridging process is explained in the following steps:
1. Bridge to Base
If you don’t already have tokens on the Base network, you’ll need to bridge to Base first before you can bridge to the Degen L3.
You can find steps on how to bridge to Base here
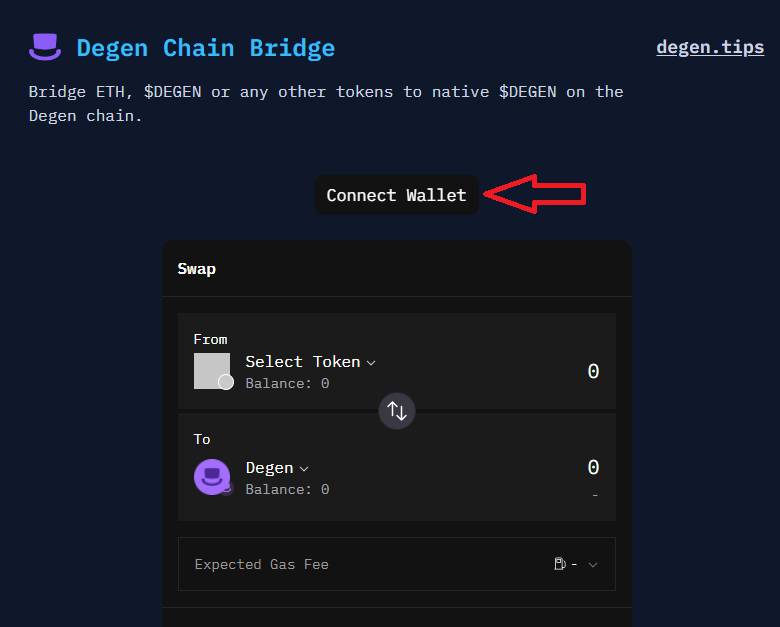
2. Go to the Degen Bridge
Please make sure to use only official links to prevent a wallet compromise. The home page should look like this:

3. Connect Wallet
Click the connect wallet button in the middle of the homepage.
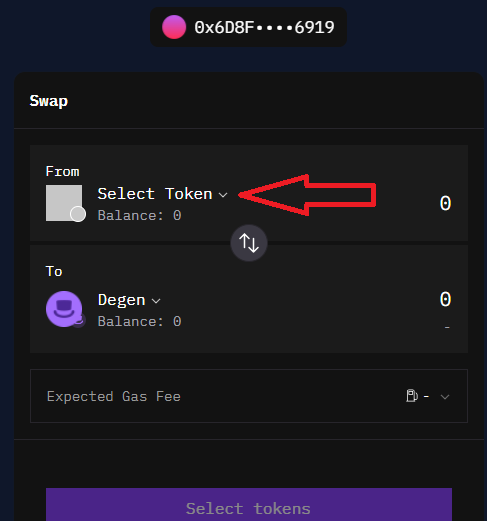
4. Sign approval message
Sign the approval message that pops up right after clicking connect wallet.
5. Click on “Select Token” in the “From” section
6. Ensure you’re on the Base section and select the token you wish to bridge
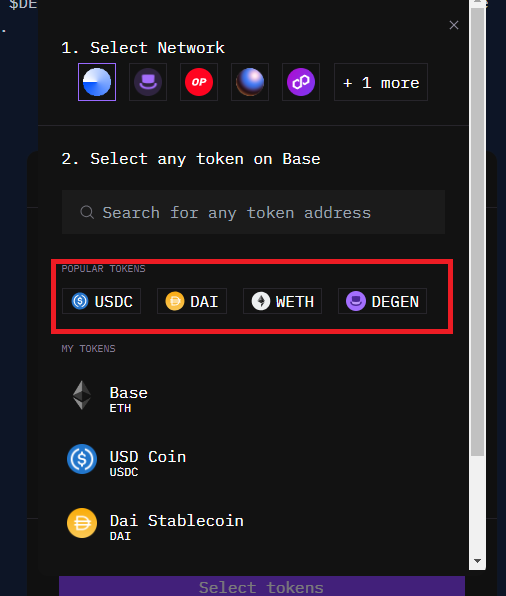
You can bridge any base tokens from Base, Base ETH, Base USDC, and even DEGEN on Base.
7. Click on the “Select Token” in the “To” section
Like in the previous step, click on the Select token option.

8. Ensure you’re on the Degen Network in the “To” section.

9. You can only bridge to the Degen token for now so select it.
10. After choosing $DEGEN wait a while for the transaction to “Fetch Route”
This step could take a few minutes but should be fast in general.
11. Approve the transaction and receive your DEGEN on the DEGEN L3.
Why are bridging fees so expensive?
When you bridge tokens to a layer2 or layer 3, they are temporarily locked in a smartcontract. This smartcontract mints an equivalent amount of the receiving token, (in this case, $DEGEN) on the next layer (in this case, the Degen L3). It then sends the minted tokens to the wallet that initiated the bridge on the new layer. That’s a basic overview of how bridging works. As you can tell, this process is multi-step and so it requires a significant amount of computation. Most of the computation happens on the lower layer (in this case, Base) hence the relatively more expensive fees.
Summary
In this article, we’ve explored the Degen layer 3 and how to bridge to it. Degen is an application chain and we’re yet to see what will be done with it. To use Degen, you need to first obtain Base tokens. If you don’t already have tokens on the Base network, this guide will help you with that. That’s all for this guide.